Table of Contents
- Introduction
- Pre-requisites
- Creating Workflow to Deploy to Desired Site Location(s)
- Verifying Nile DHCP Service Activation
- Setting Parameters for the Nile DHCP Service
- Mapping Subnets to Segments
- Verify Service
Introduction
Dynamic Host Configuration Protocol (DHCP) is a crucial part of any enterprise network. It is used to dynamically assign the IP address and other information to each host on the network so that they can communicate efficiently. DHCP automates and centrally manages the assignment of IP addresses, easing the work of network administrators. The Nile DHCP Service is designed to address the security and operational complexity organizations face when managing DHCP, bringing benefits of a fully cloud-delivered service to the campus network. The service eliminates the need for on-premises infrastructure, reducing the infrastructure overhead costs associated with traditional DHCP setups.
Pre-requisites
- Nile Access Service
Creating Workflow to Deploy to Desired Site Location(s)
Verifying Nile DHCP Service Activation
The Nile DHCP service should be visible within the Nile Portal (See Figure 1) after a successful subscription. If you don’t see Nile DHCP, please contact the local Nile account team for assistance. To verify, within the Nile Portal:
- Go to Settings
- Click on the DHCP tab. This will display all DHCP servers that have been set up. A successful Nile DHCP Service subscription would automatically display “NILE DHCP” within the list.

Setting Parameters for the Nile DHCP Service
Adding Subnet Pools
1. Click on Nile DHCP to open the page to add DHCP Subnet pools.
2. In the new Dialog box on the right (Figure 2), click the + icon.

- Under the Pool name, name the pool.
- Under Network, type the IP pool block you want to configure.
- Under Default Gateway, type the gateway IP address.
- Under Lease time, select the value from the drop-down list.
- Within IP Range, click the + button to create IP ranges desired
- Add the Start IP and End IP for that network.
- If additional parameters are desired, visit the “Advanced preferences” section in this guide. Otherwise, verify desired parameters and click SAVE to save the configuration.

(Optional) Advanced Preferences
Adding IP Reservation
Note: The Nile DHCP Service reserves an IP address for the device based on the MAC address.
- Under the DHCP Reservation section click the + button to create the IP reservation
- Type the Hostname of the device, add the MAC address of the device, and the IP address you want to reserve. If no additional options are needed, click SAVE to save the configuration. See Figure 4 for an illustrated example.

DHCP options are additional parameters that a DHCP server can pass to DHCP clients. The following DHCP options are supported:
- Option 3—Router option. It specifies the gateway address to be assigned to the clients.
- Option 6—DNS server option. It specifies the DNS server IP address to be assigned to the clients.
- Option 15 – DNS domain name of the client
- Option 26 – Interface MTU size
- Option 42— NTP Server Addresses.
- Option 60—Vendor class identifier option. A DHCP client uses this option to identify its vendor. A DHCP server uses this option to distinguish DHCP clients and assigns IP addresses to them.
- Option 66—TFTP server name option. It specifies the TFTP server domain name to be assigned to the clients.
- Option 67—Boot file name option. It specifies the boot file name to be assigned to the client.
- Option 150—TFTP server IP address option. It specifies the TFTP server IP address to be assigned to the clients.
Select the Option from the drop-down list and type the value relevant to the option and then click SAVE to save the settings. See Figure 5 for an illustrated example.

Once the settings are saved you will see the created subnet pools with the parameters set in previous sections. See Figure 6 for an illustrated example.

Mapping Subnets to Segments
Subnets created in the previous section will need to be mapped to the desired segments. For help setting up segments refer to the Nile Settings Guide.
Within the Nile Portal, go to Settings > Click the Segment Tab >Select the segment to map >Navigate to the Service area. Figure 7 shows an example of what the screen should look like.
Note: Nile DHCP Service supports the use of the same IP subnet across multiple sites or the use of different subnets across multiple sites.
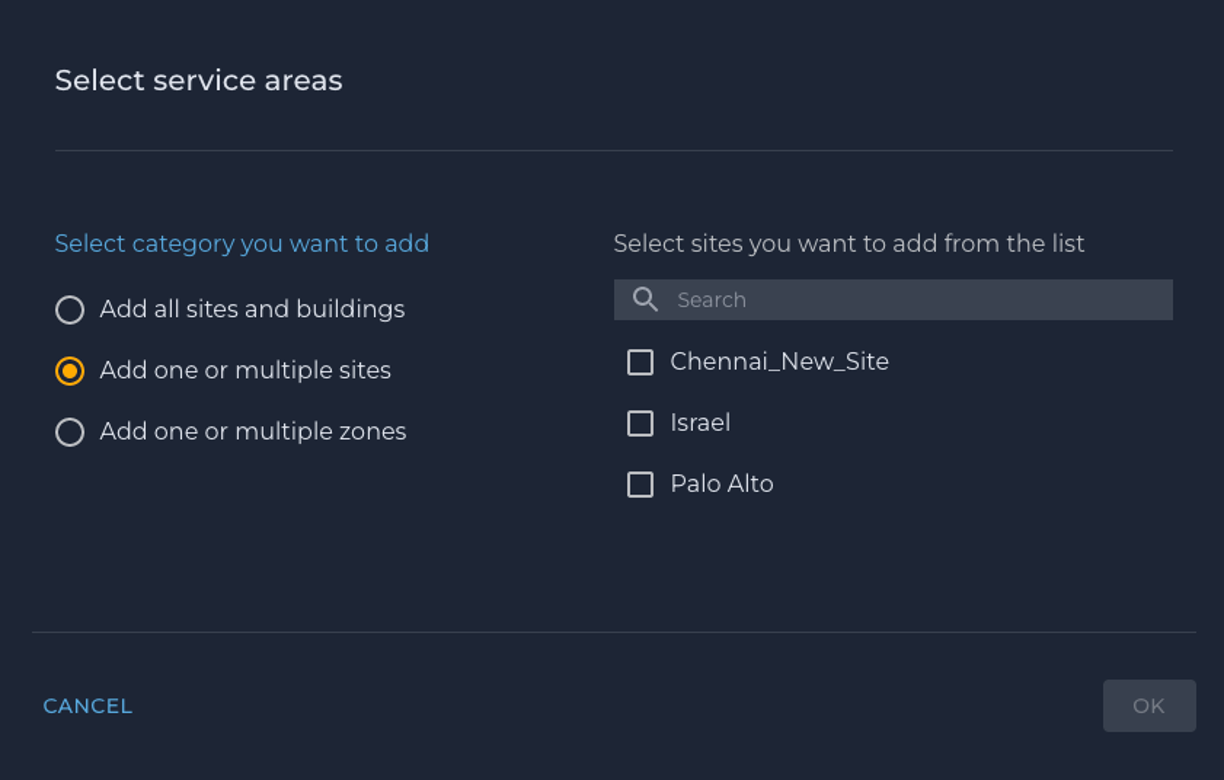
The Service area is used to identify sites to deploy DHCP Service with the parameters set in previous sections.
- Within the Service area, select the category you want to add. Figure 8 shows an example.
- Add all sites and buildings.
- Add one or multiple sites, Select the sites on the right.
- Add one or multiple zones.

- The next step is to select the Authentication, the DHCP Server, and map the Subnet. See Figure 9 for an illustrated example.
- Verify setup and click SAVE.

Verify Service
To verify service is working as intended on the desired sites, within the Nile Portal, navigate to Infrastructure, Click on DHCP > Nile DHCP
Subnet Pool Usage
All configured and mapped subnets will be shown with details about Subnet utilization, Number of IPs used, and the segment that they belong to. Figure 10 shows the illustrated example.

IP Mapping
Clicking on each Name or Subnet will provide information on the IP address mapping and other information like state, hostname, lease history, and timestamps. See Figure 11 for an illustrated example.

