
Create ServiceNow Development Instance for testing
- Log into ServiceNow. You can create a new account if you don’t have one yet.
- ServiceNow provides the capability to create a developer instance, for free, that is useful for NSB integrations testing. This document describes how to create such a developer instance for this purpose. The steps will be the same in the production ServiceNow instance.
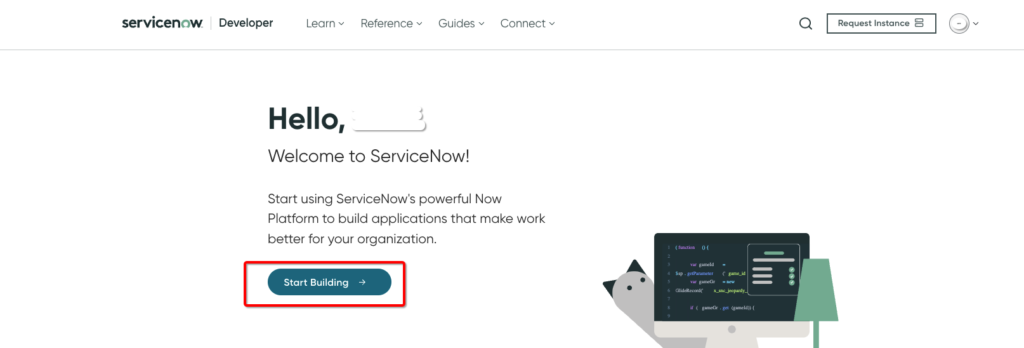
- To create a developer instance, go to https://developer.service-now.com/dev.do Build a developer ServiceNow instance by the following steps.
- To create a developer instance, click on Start Building button.
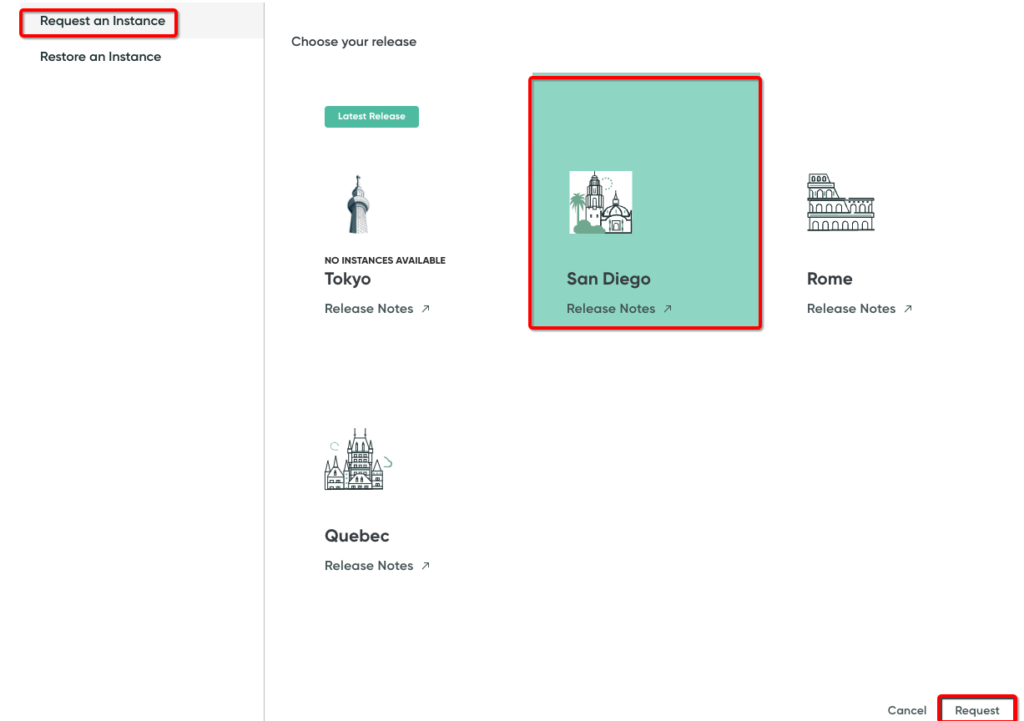
Click Request an Instance.
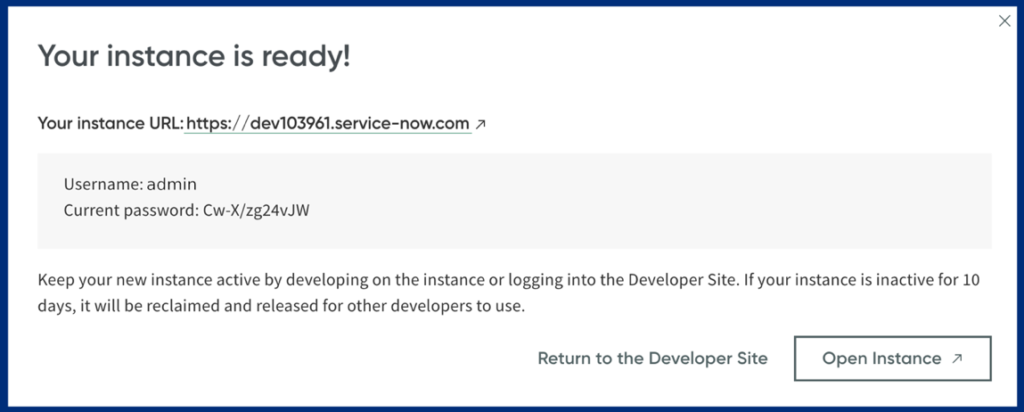
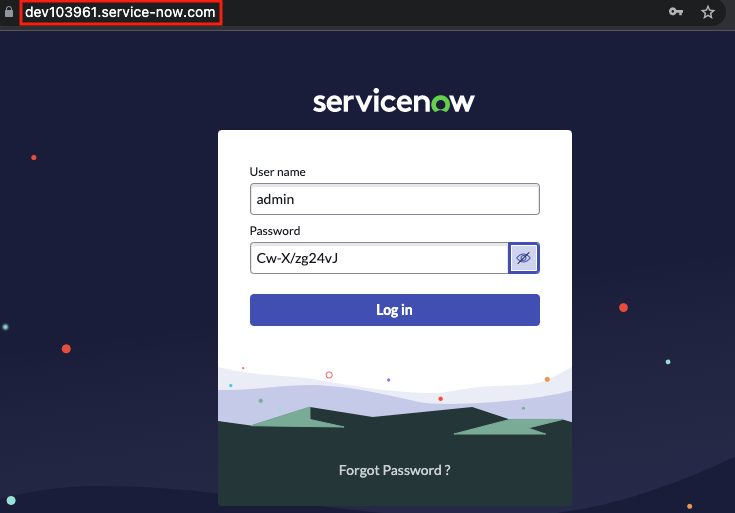
- After building the developer instance, you will be provided with the instance URL, login username, and password. In our example, the developer instance URL is:
https://dev103961.service-now.com/
The username/password may be different than admin (admin in this example) with password “Cw-X/zg24vJ”
Important Note: If you do not access the developer instance for a few days, the instance state will be changed to hibernate. After some time, it will be deleted.
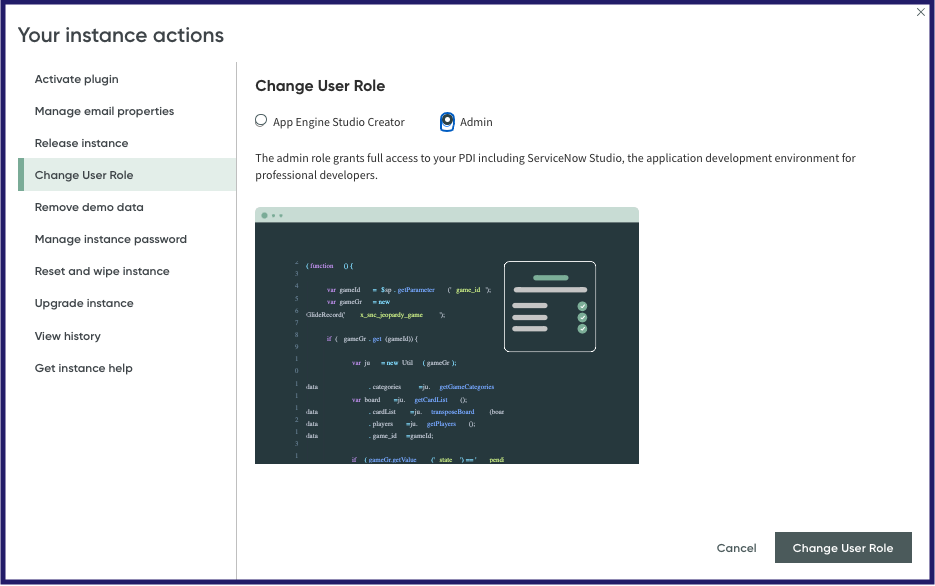
- Switch to the admin role by clicking on the account at the top right to view the instance actions, and select ‘Change User Role’
- Log in to the new instance using your admin account
Create ServiceNow New Fields for Nile Service
- ServiceNow provides default fields for Incident, and this can be extended. Add a new field, “External Id” as an example, to the Incident table. This field will be used to correlate Nile alerts to ServiceNow Incidents.
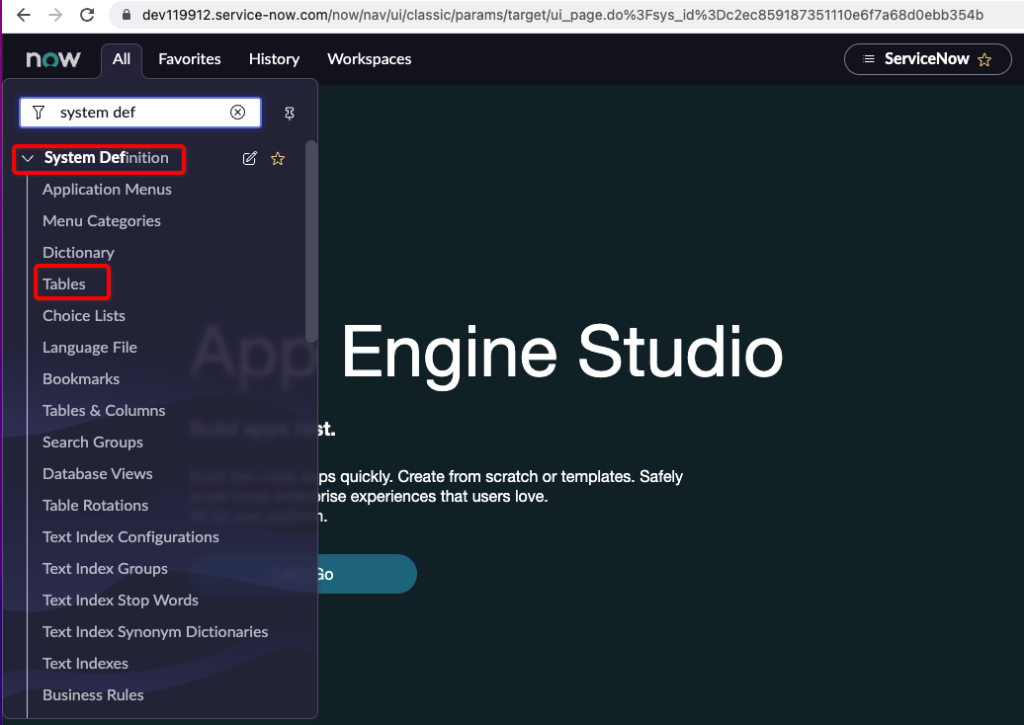
- From “All”, filter to locate “System Definition”, under System Definition, select “Tables”
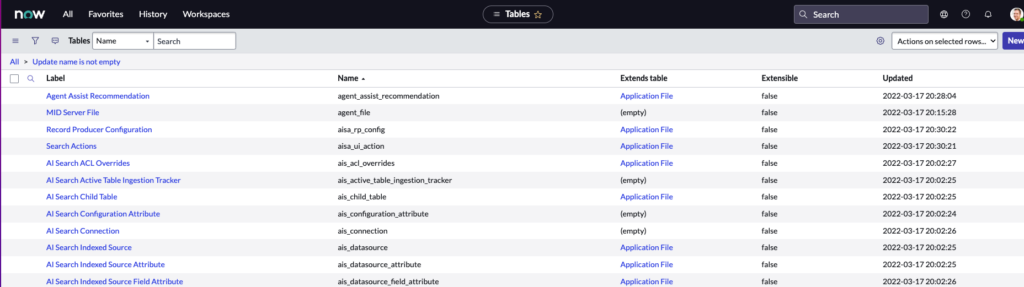
- The list of tables (model) in the ServiceNow is shown below:
- Search for Tables “Incident”.
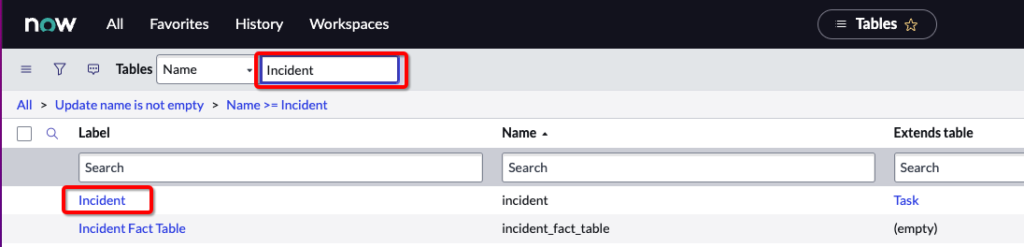
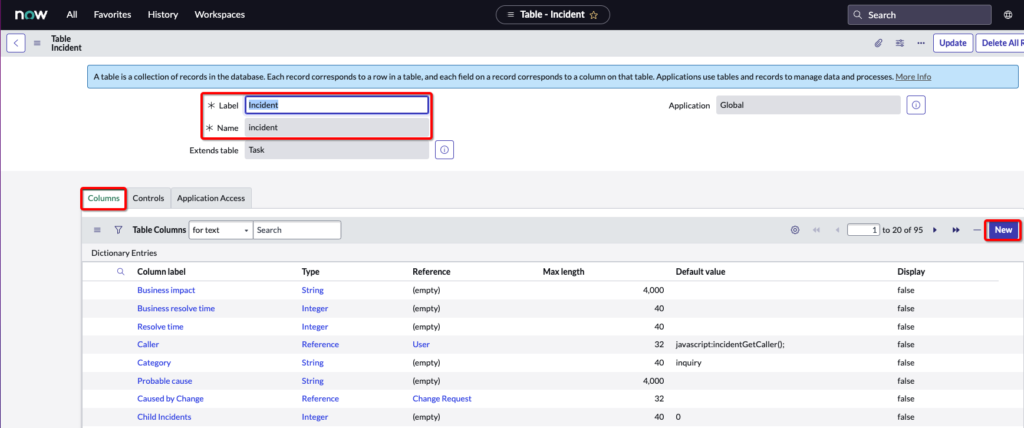
Add to the Label field the string “Incident”.
Add to the Name field the string “incident”.
Click the Columns button.
Click the New button .
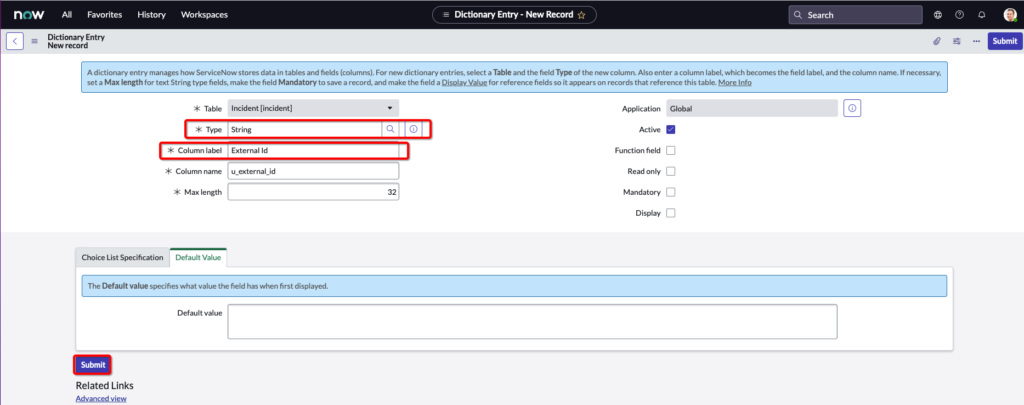
- In the Type field, type “String”.
In the Column label field, type “External id”.
(The Column name will auto generate “u_external_id”; we will use the column name for the integration with Nile webhooks.)
In the Max length field, type “32”.
Click “Submit”.
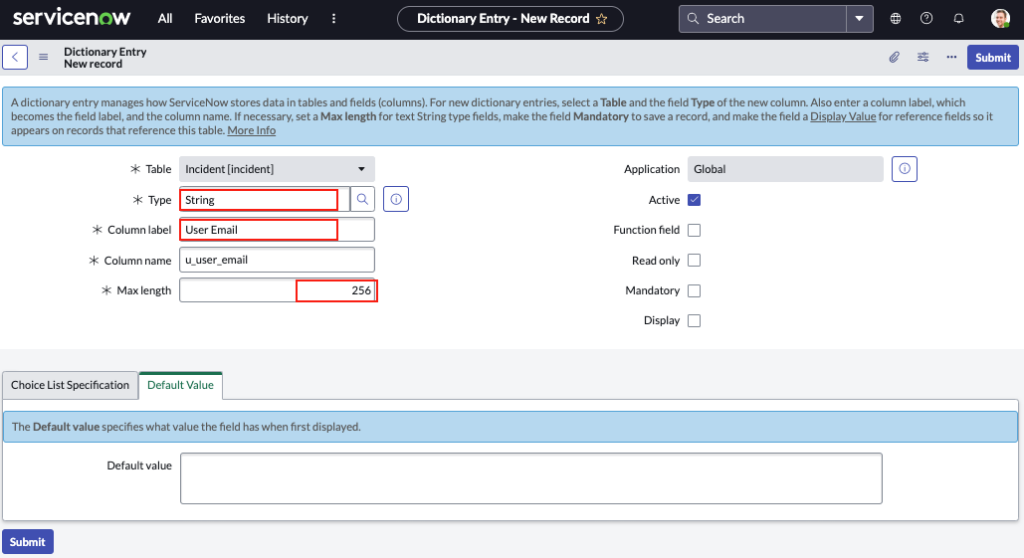
- Click “New” again to update the table schema/model with the “User Name” column, with “String” type and max length as 256, then click ‘Submit’

- Repeat the above action to create the “User Email” field with “String” type and max length of 256, the click ‘Submit’
Create Scripted REST APIs
- The next step is to create a “Scripted Rest APIs”, which handles the Webhooks requests from Nile.
- In the ServiceNow navigation bar, type “Scripted Rest APIs” and click the link. It shows a list of existing REST APIs
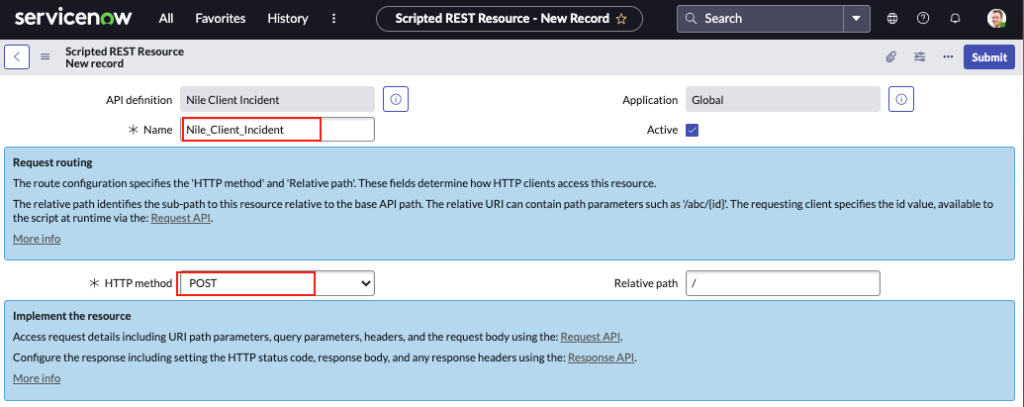
- Click New, and fill the Name field with the string “Nile Client Incident”.
Click ‘Submit’. This saves the REST APO and takes it to the main listing page. - Search the created RESP API and click it. Under “Resources” tab, click ‘New’, and fill the Name field with the string “Nile_Client_Incident”.
For the HTTP method, select “POST” from the drop-down field.
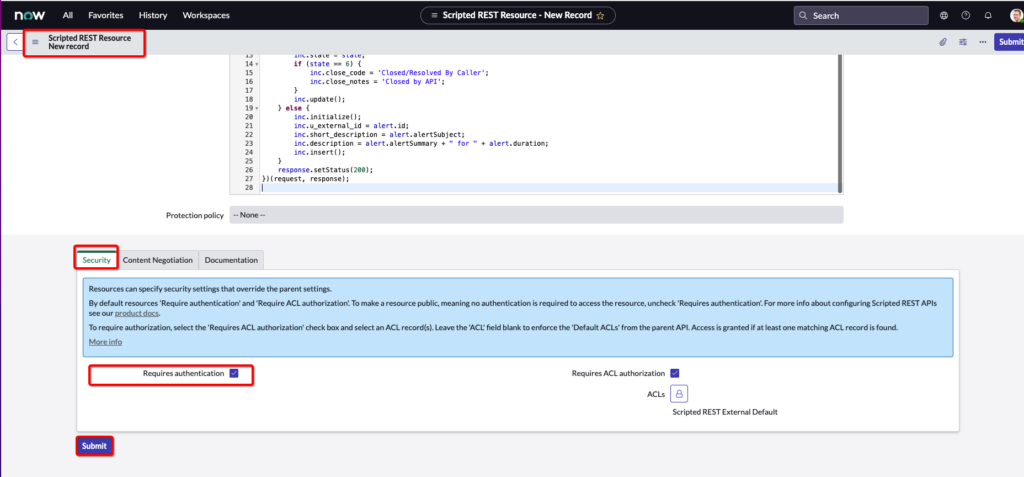
- In the “Script” section, copy and paste this script:
(function process(/*RESTAPIRequest*/ request, /*RESTAPIResponse*/ response) {

var incident = request.body.data;
var inc = new GlideRecord('incident');
inc.initialize();
inc.u_external_id = incident.request_id;

inc.short_description = incident.title;
inc.u_user_email = incident.email;
inc.u_external_id = incident.id;
inc.u_user_name = incident.name;

var description = incident.description;

// append details to the description

description = description.concat("\n\n", "SSID: ", incident.ssid);
description = description.concat("\n", "MAC: ", incident.mac);
description = description.concat("\n", "IP: ", incident.ip_address);
description = description.concat("\n", "Device Type: ", incident.device_type);
description = description.concat("\n", "Segment: ", incident.segment);
description = description.concat("\n", "Location: ", incident.location);
description = description.concat("\n", "Incident Reported Time: ", incident.time);

inc.description = description;

var sys_id = inc.insert();
gs.print("Newly created incident sys id is " +sys_id);

// Now save the attachments
var StringUtil = new GlideStringUtil();
for(var i = 0; i < incident.attachments.length; i++) {
var sa = new GlideSysAttachment();
sa.write(inc, incident.attachments[i].attachment_name, incident.attachments[i].content_type, StringUtil.base64DecodeAsBytes(incident.attachments[i].data));
}

var queried_inc = new GlideRecord('incident');
queried_inc.addQuery('sys_id', '=', sys_id);
queried_inc.query();

var res = {};
if (queried_inc.next()) {
res['incident_id'] = queried_inc.number;
} else {
res["incident_id"] = sys_id;
}

response.setStatus(200);
response.setContentType('application/json');
response.setBody(res);
- Under the Security tab, make sure that “Requires Authentication” checkbox is enabled. Then click ‘Submit’
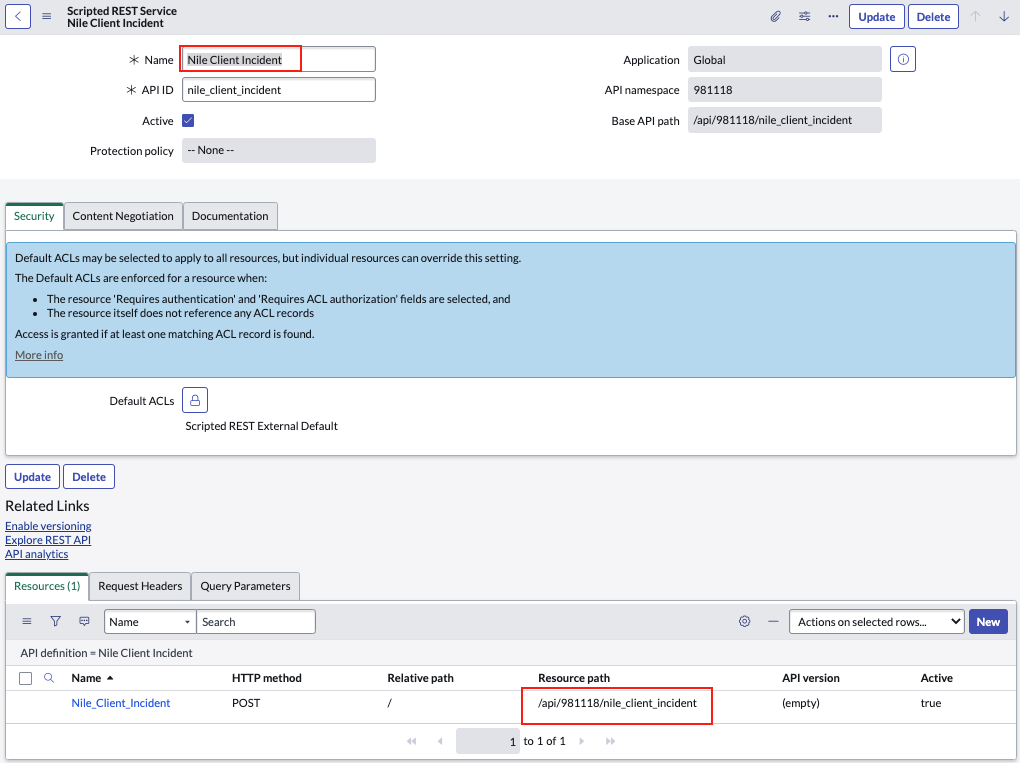
- Once submitted, the resource name “Nile_Client_Incidents” appears in the list under “Nile Client Incident” API. Note the Base API Path URL, as this will be needed for integration and API testing.
In our example, the resource path is “/api/981118/nile_client_incident”
- This completes the ServiceNow setup.
Postman for the REST API Authentication Token
- To set up the Webhook in the Nile Portal, the REST API authorization token is required.
- Postman would be used to collect the token as follows:
- Launch Postman
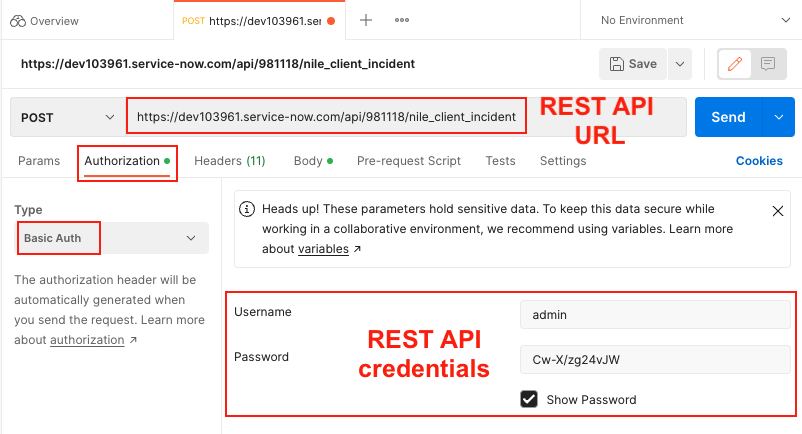
- Enter the REST API URL as a POST
- Select the ‘Authorization’ tab.
- Select Type to “Basic Auth” from the drop-down list.
- Enter the admin credentials as Username “admin” and Password“ Cw-X/zg24vJ”
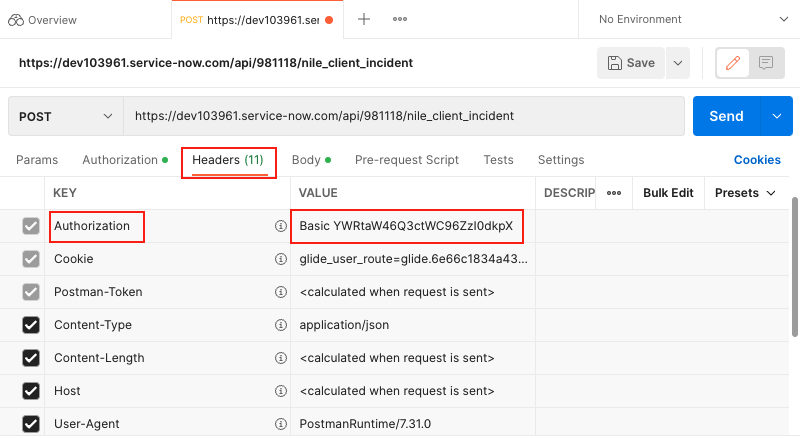
- Click the Headers
- Into the Authorization field, enter the value. In this example,
“Basic YWRtaW46Q3ctWC96ZzI0dkpX”
Add ServiceNow Webhooks to Nile Portal
- Log into Nile Portal using an admin account.
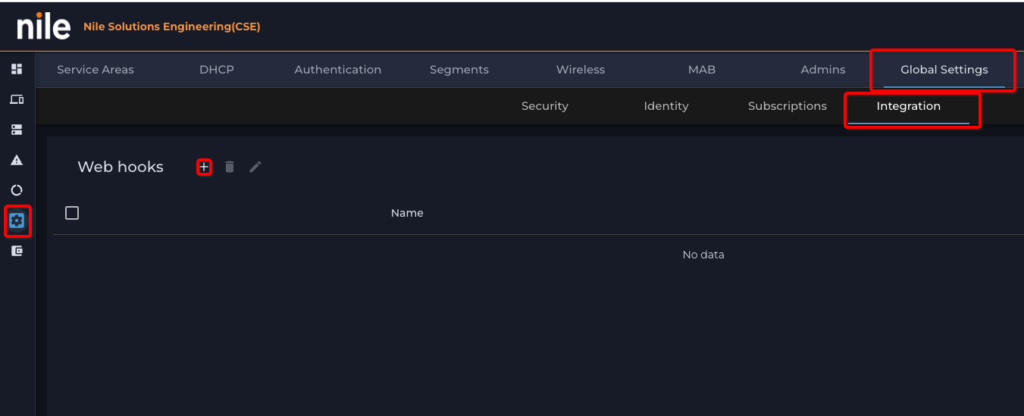
- Click on (Settings icon) on the left side.
- Click on Global Settings
- Click on Integration tab (second row)
- Click on the“+” button to add ServiceNow webhooks.
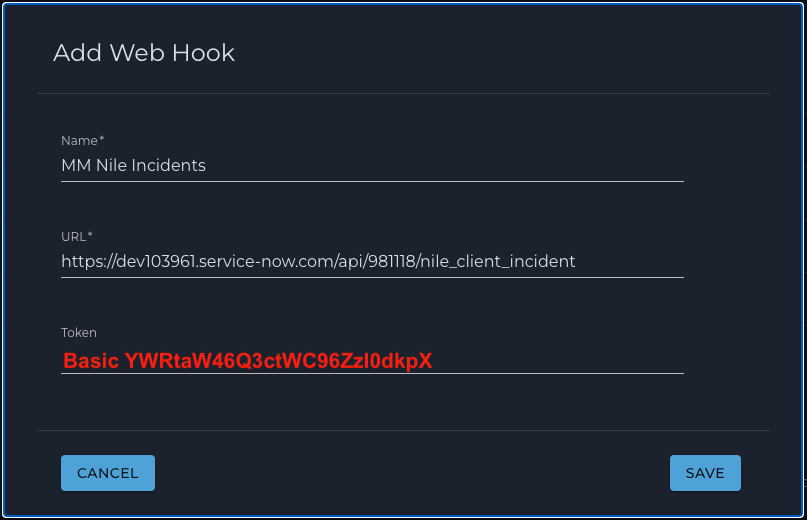
- Fill out the ServiceNow Webhooks info:
- Name: Webhooks name; example “MM Nile Incidents”
- URL : ServiceNow API URL:https://instance name + resource path In our example, it will be: https://dev103961.service-now.com/api/981118/nile_client_incident
- Token: Basic Authentication token generated by Postman.in our example: “Basic YWRtaW46Q3ctWC96ZzI0dkpX”
- Click on SAVE to save the settings.
Enable Webhooks Subscriptions
- The Nile Portal has the option to send user generated incidents from the nilesecure.com page to the Nile Portal admin via Webhooks to ServiceNow.
- Login to the Nile Portal using an admin account
- Click on (Settings icon) on the left side.
- Click on Global Settings
- Click on Subscriptions (second row of tabs).
- Select the Webhooks URL created earlier “MM Nile Incidents” from the dropdown list as the option to the “My Nile Incidents” feature.

Create a Nile Client Incident
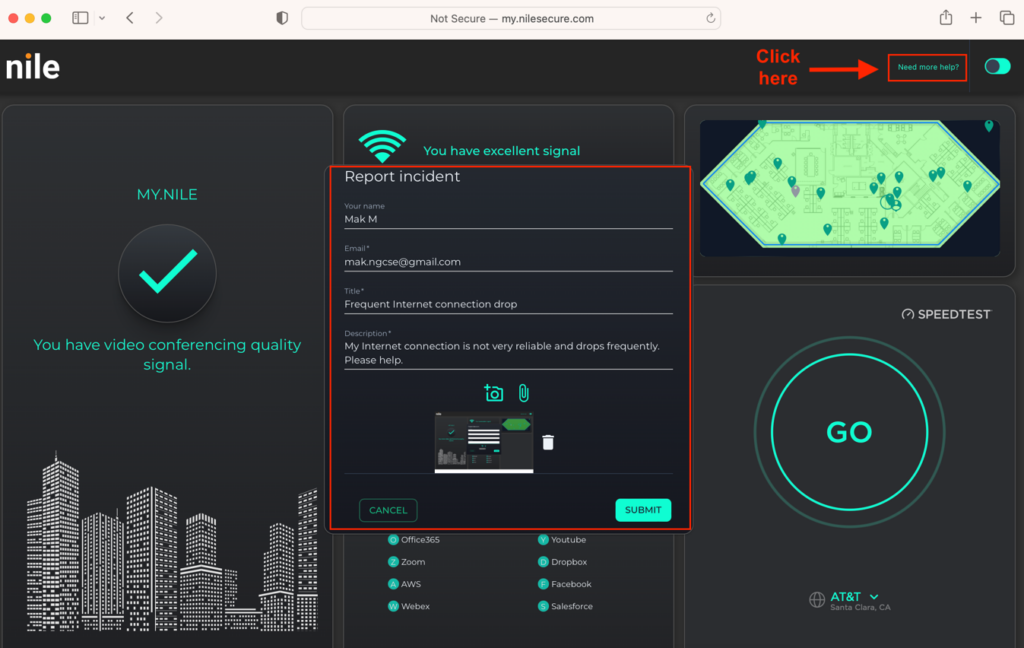
- As a user connected to the Nile service, launch a browser and connect to https://my.nilesecure.com
- Click on the “Need more help?” link in the top right of the browser screen to launch the “Report incident” window.
- Fill in the incident details to report to your Nile Admin. Attach a screenshot or another file as needed. Click the ‘SUBMIT” button to submit the incident.
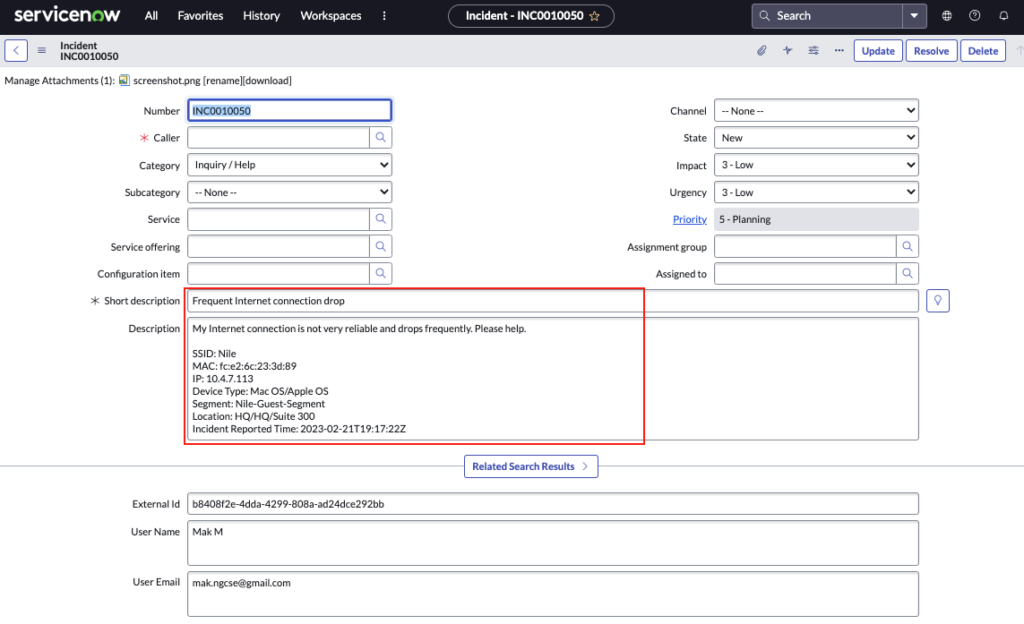
Verify Nile Client Incident under ServiceNow
- Login to ServiceNow instance as an admin.
- Display the ServiceNow Incidents under All
- Filter on Service Desk,
- Click on Incidents.
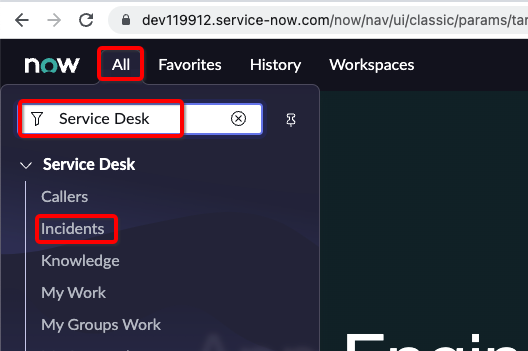
The Incidents table is then displayed. Verify your incident is shown here.