

Okta App Integration Setup
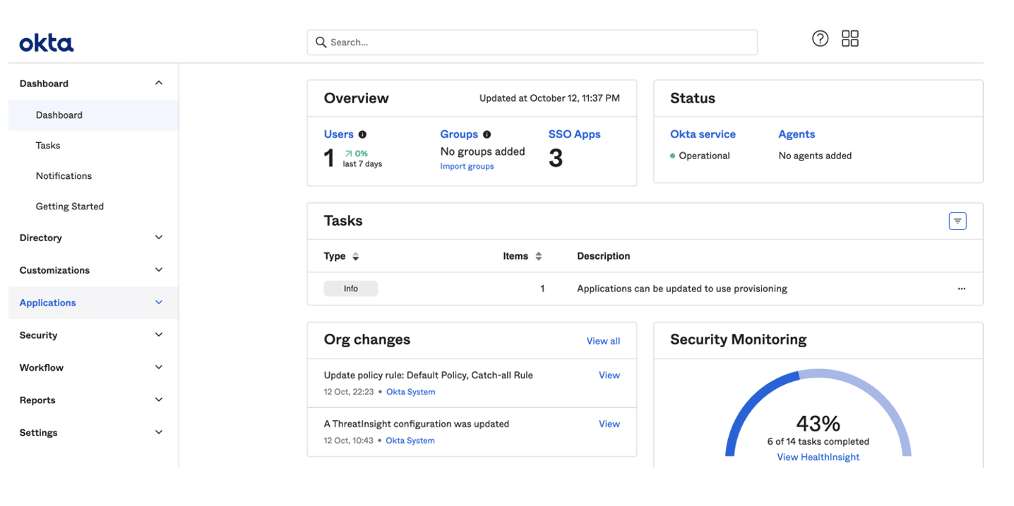
1. Login to your Okta portal
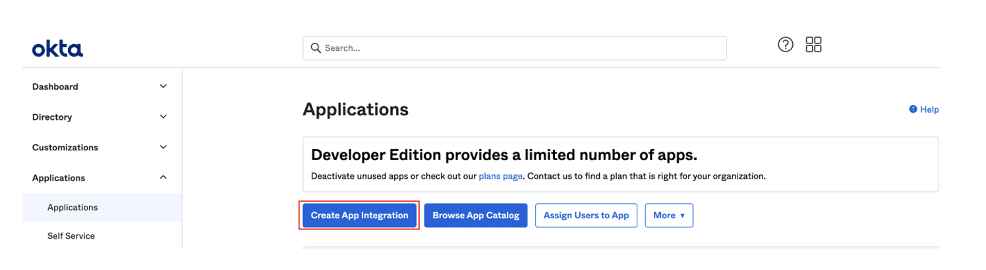
2. Go to Applications > Applications page
3. Click the Create App Integration button
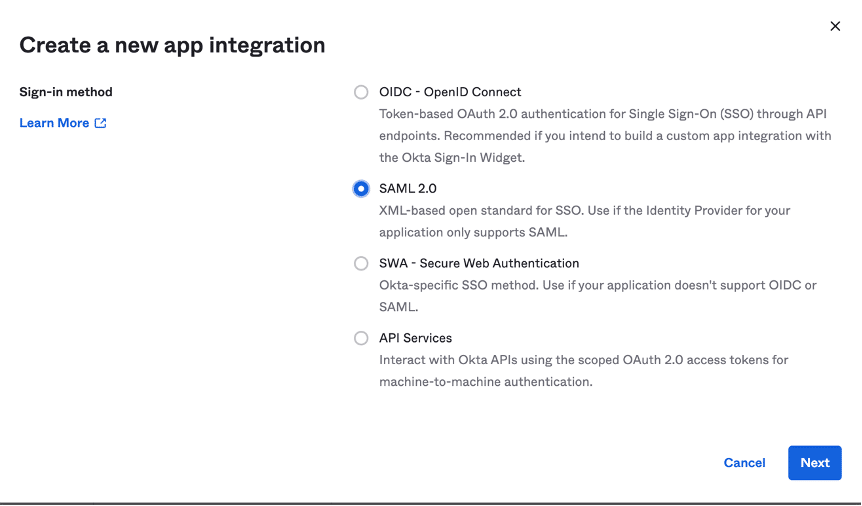
4. In the Create a new app integration, select SAML 2.0:
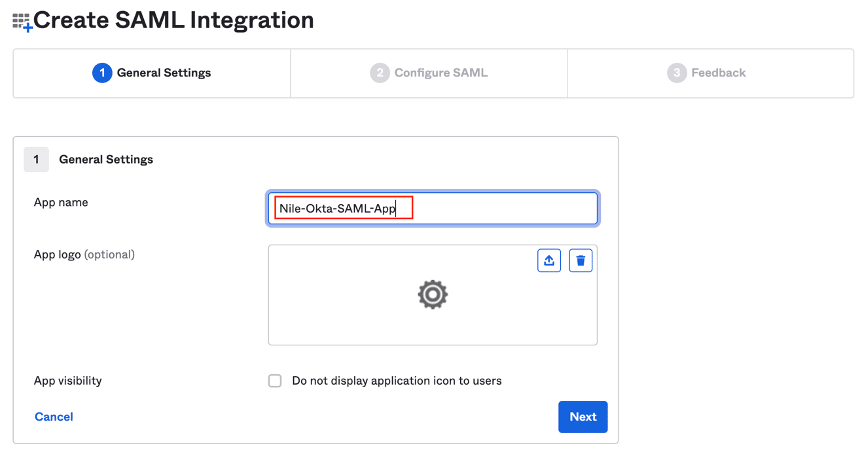
5. In the Create SAML Integration, enter an appropriate name for the application and click Next:
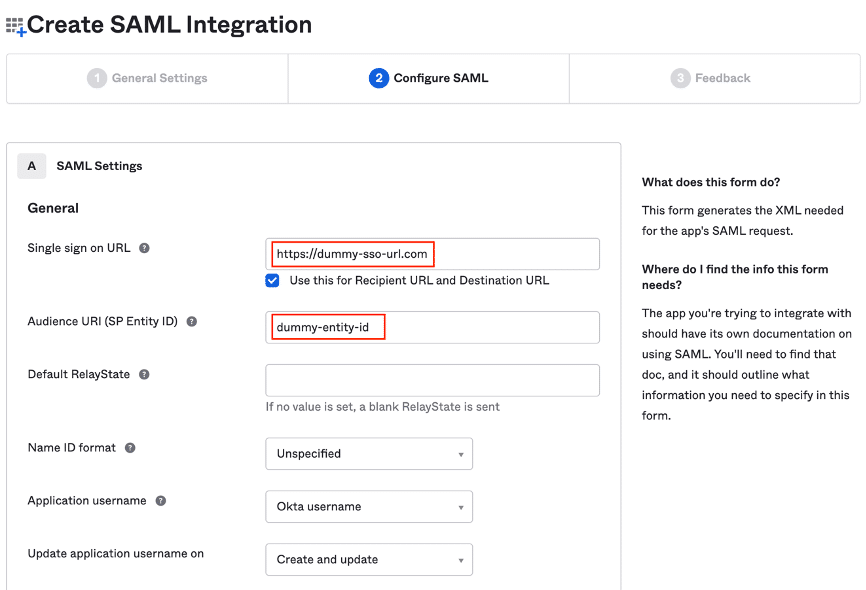
6. In the SAML Settings section, fill out dummy placeholders for the ‘Single sign on URL’ and ‘Audience URI’:
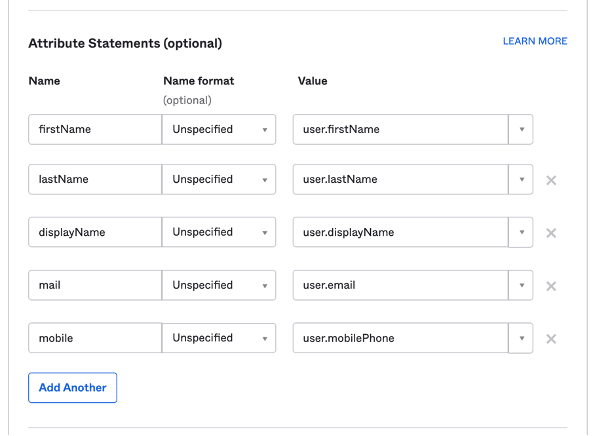
7. Scroll down the same page and add ‘Attribute Statements’ for the following as per the illustrated screenshot:
- firstName
- lastName
- displayName
- mobile
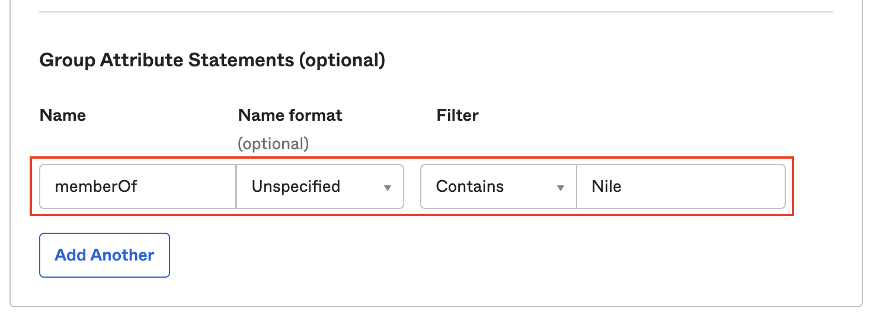
8. Scroll down further on the same page and add “Group Attribute Statements’ for the following:
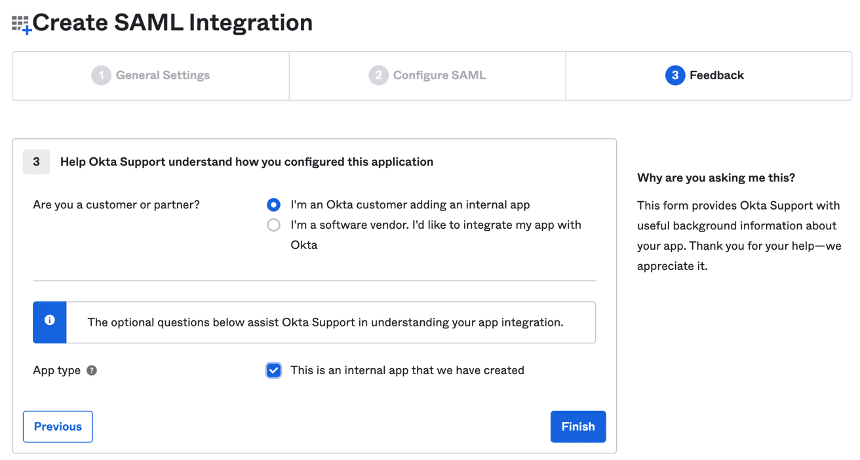
9. Click Next and select the following options to finish the setup:
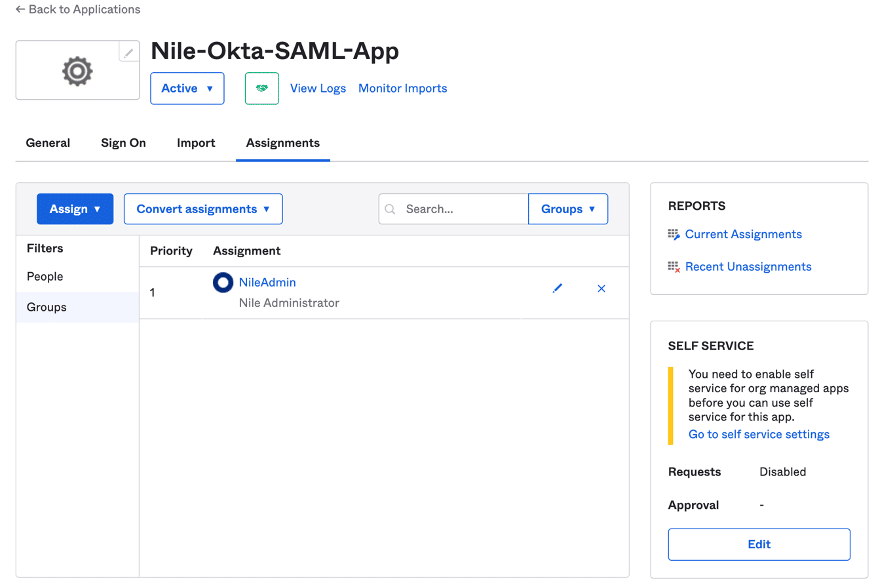
10. Go to the Assignments tab and assign users and groups to the application to complete the App Integration setup:
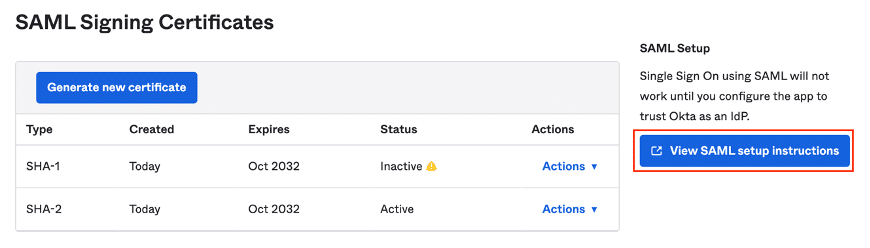
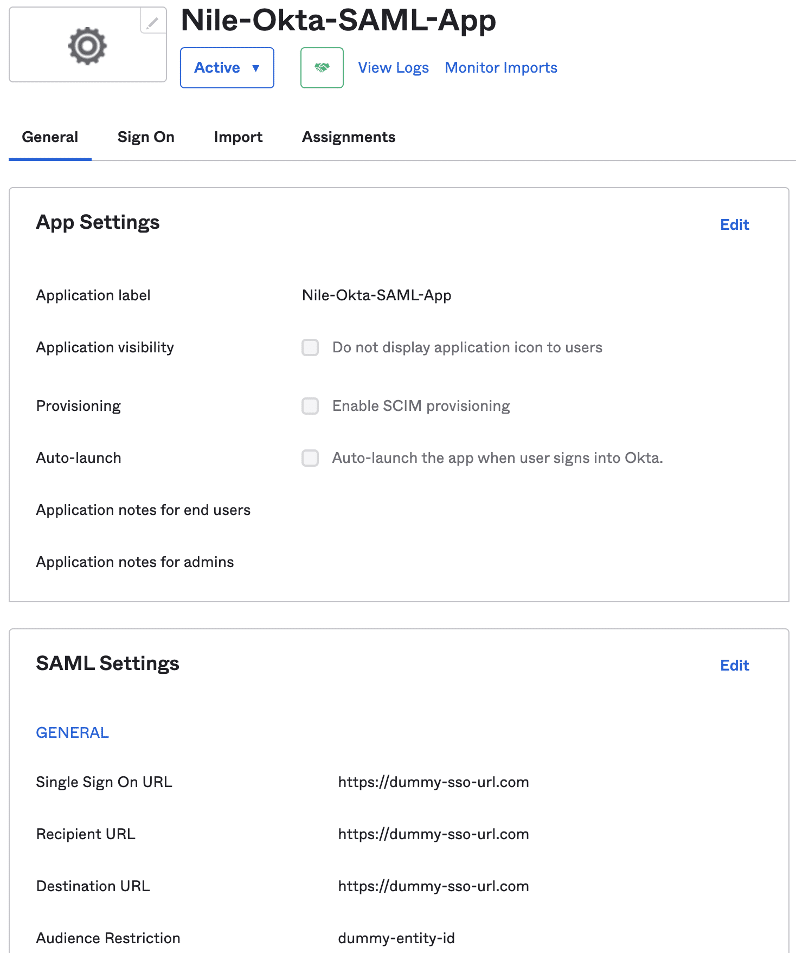
11. Go to the Sign On tab on the same page and click The View SAML setup instruction button to display important parameters that will be used in the Nile Portal Provider configuration:
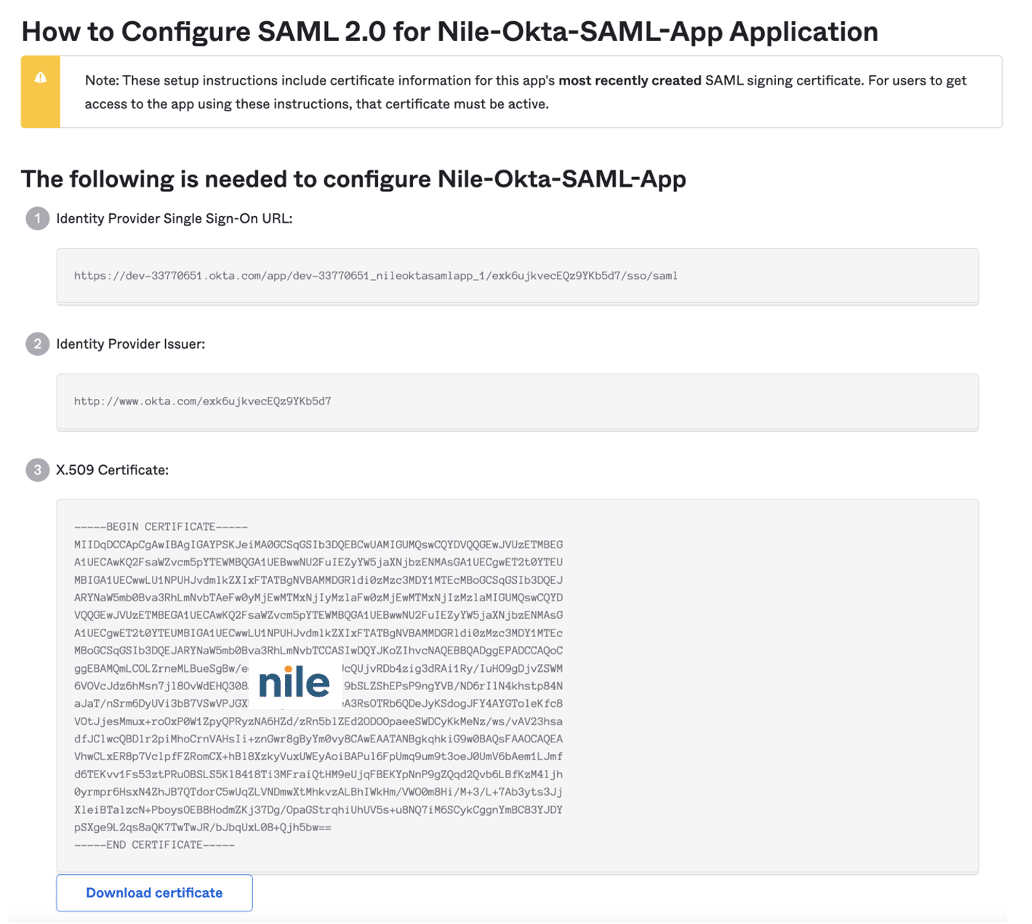
12. Take note of the following Identity Provider URLs and then click on the Download certificate button to save the X.509 certificate:
IdP Single Sign-on URL:
https://dev-33770651.okta.com/app/dev-33770651_nileoktasamlapp_1/exk6ujkvecEQz9YKb5d7/sso/saml
IdP Issuer:
http://www.okta.com/exk6ujkvecEQz9YKb5d7
13. Go to the next section to collect the parameters needed by the Okta app, and complete Nile Portal configuration.

NOTE
Note: An Okta group named ‘NileAdmin’ assigned to the user and application has been previously created to be returned as a value to the ‘memberOf’ attribute.
Nile Portal Identity Provider Setup
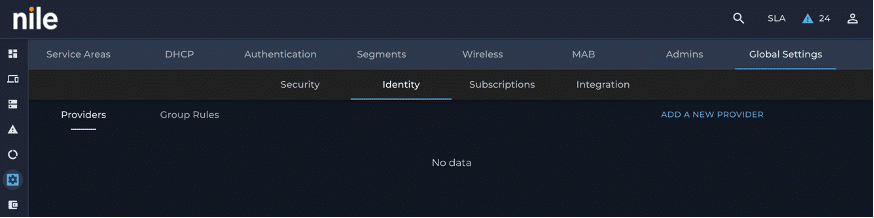
14. Login now to the Nile Portal with the same Okta administrator at https://www.nile-global.cloud, and navigate to Settings -> Global Settings -> Identity page:
Click on ADD A NEW PROVIDER and fill out the form as follows:
Name: OKTA SSO
IdP Issuer URI: IdP issuer from step 12
IdP SSO URL: IdP Single Sign-on URL from step 12
Destination URL: IdP Single Sign-on URL from step 12
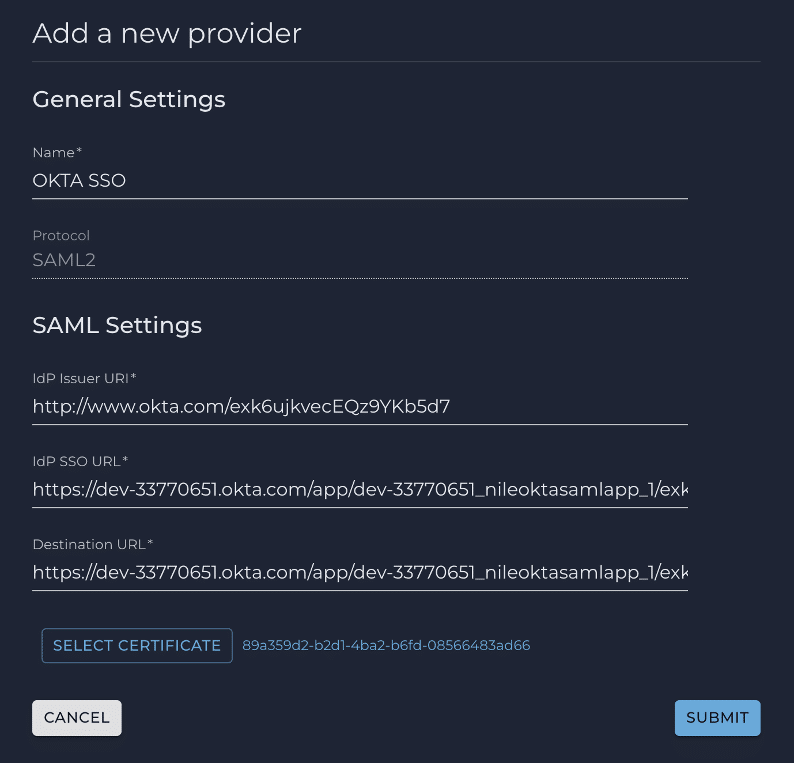
16. On the same form, click on SELECT CERTIFICATE to upload the okta.cert certificate downloaded earlier
17. Click the SUBMIT button to complete adding the Okta provider:
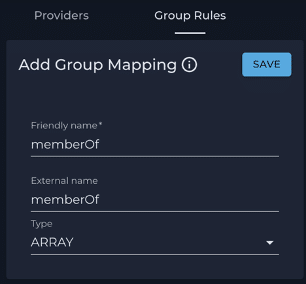
18. Click the Group Rules tab to proceed with group mapping:
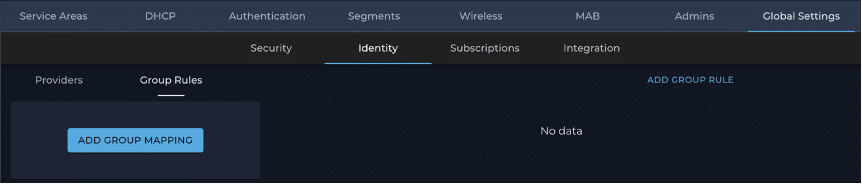
19. Click the ADD GROUP MAPPING button to configure the group mapping attribute:
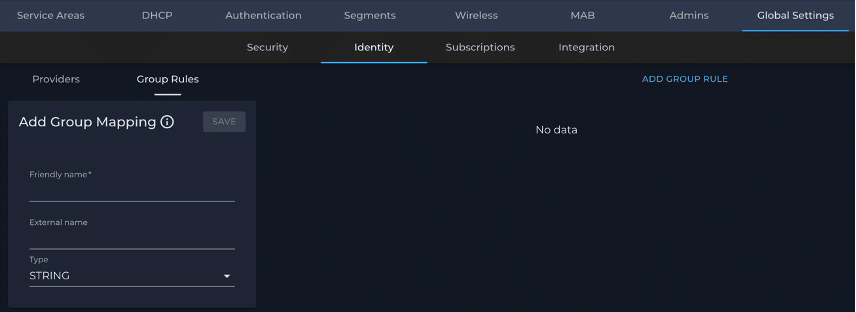
20. Fill out the form as shown below to setup the group mapping attribute and click the SAVE button:
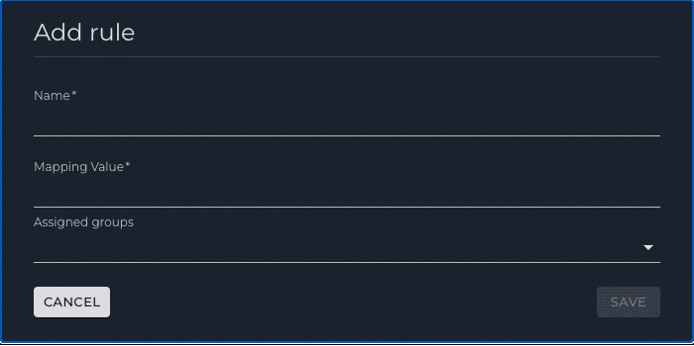
a. Click the ADD GROUP RULE button to display the ADD rule form:
21. Add two group rules to assign a Nile Portal group to the user by evaluating the ‘memberOf’ attribute value coming in the SAML assertion:
Name: An appropriate name
Mapping Value: Okta group name sent in the ‘memberOf’ attribute
Assigned groups: Nile Portal ‘Administrator’ and ‘Monitor’ groups
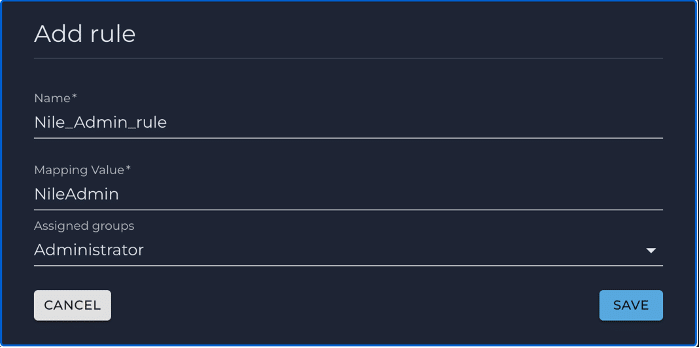
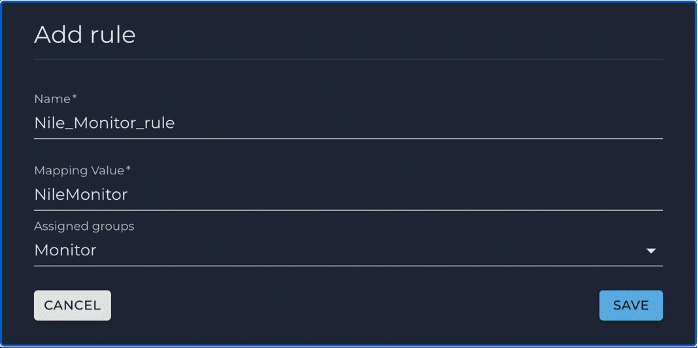
22. Click SAVE to complete the rules addition:
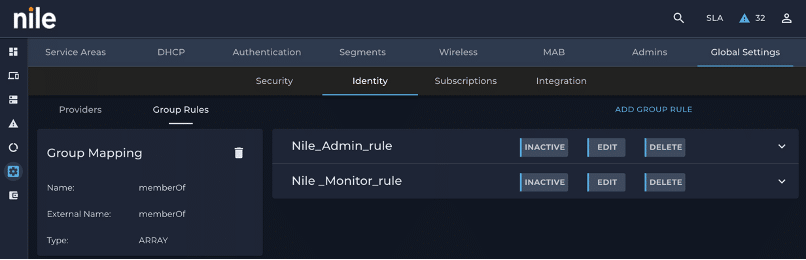
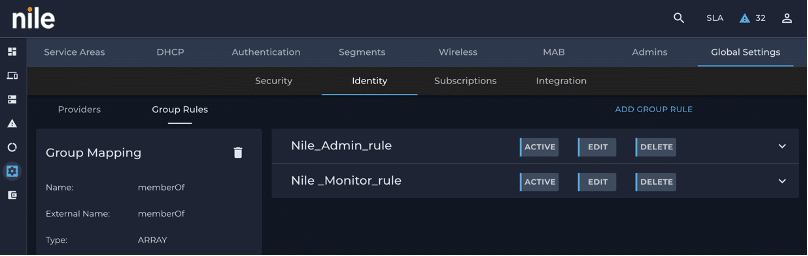
23. Activate the group rules by clicking the INACTIVE button:
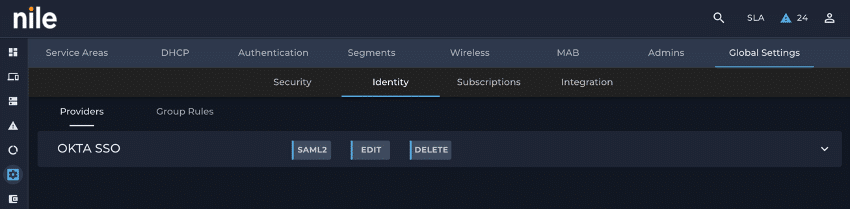
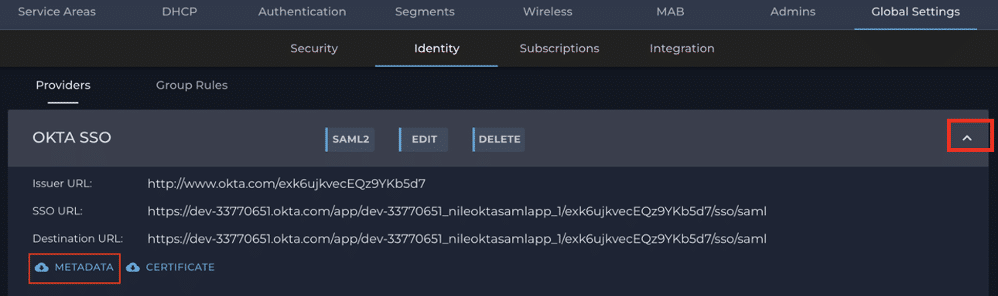
24. Go to the Providers tab and click the down arrow button present on the right side of the created identity provider bar, and click on the METADATA download button at the bottom to download the metadata file. Use the information to complete the Okta App creation:
25. Search the Metadata.xml file for the entityID and Location string values:
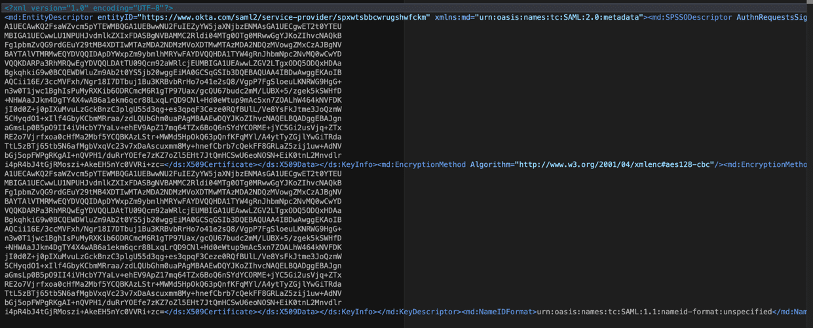
In this example: You will need to copy and paste the below URLs in the next step
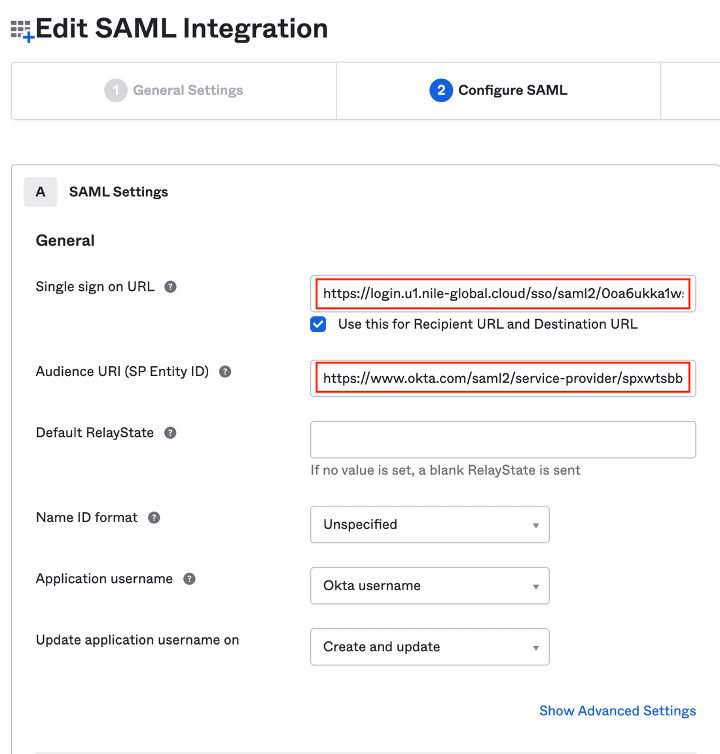
26. Location = “https://login.u1.nile-global.cloud/sso/saml2/0oa6ukka1wsFVvTQr5d7”
entityID = ”https://www.okta.com/saml2/service-provider/spxwtsbbcwrugshwfckm”
NOTE
Note: You may have to change the upload file type to “all files” in order to get the certificate file uploaded
Second Pass at the OKTA App Integration Setup
27. Go back to the Okta portal and open the Nile-Okta-SAML-app:
28. Click the Edit button and replace the dummy entries as follows:
Single Sign On URL: Location
Audience URI: entityID
PSK-SSO SSID Setup
29. Login to the Nile Portal
30. Go to the Settings -> Wireless page to create the PSK SSO SSID:
- Select the ‘Personal’ radio button
- Type the desired SSID name
- Select the Security option
- Check off the ‘Enable SSO’ box
- Enter the Pre-shared key
- Select the previously created PSK-SSO segment
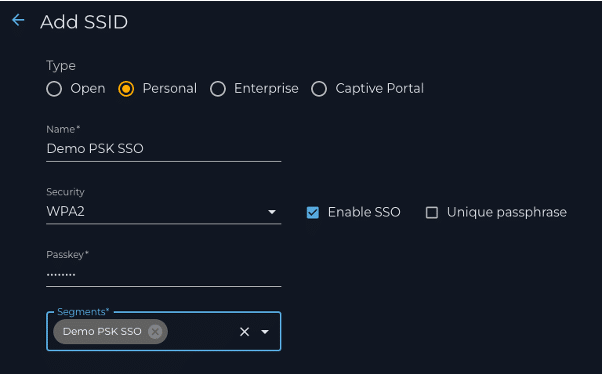
a. Click the SAVE button to complete the PSK-SSO SSID creation