1. ClearPass as an Authentication Server
a. Login to the Nile Portal and navigate to the ‘Authentication’ tab
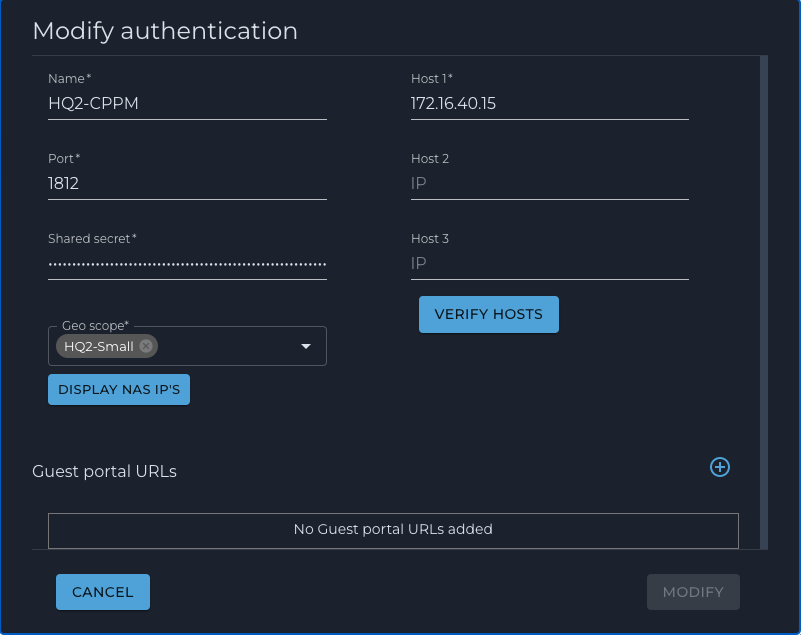
b. Click on the ‘+’ sign to add a new Authentication server
c. Fill up the form with the name, IP address, Port, Secret and Geo Scope as illustrated below:
2. Segments
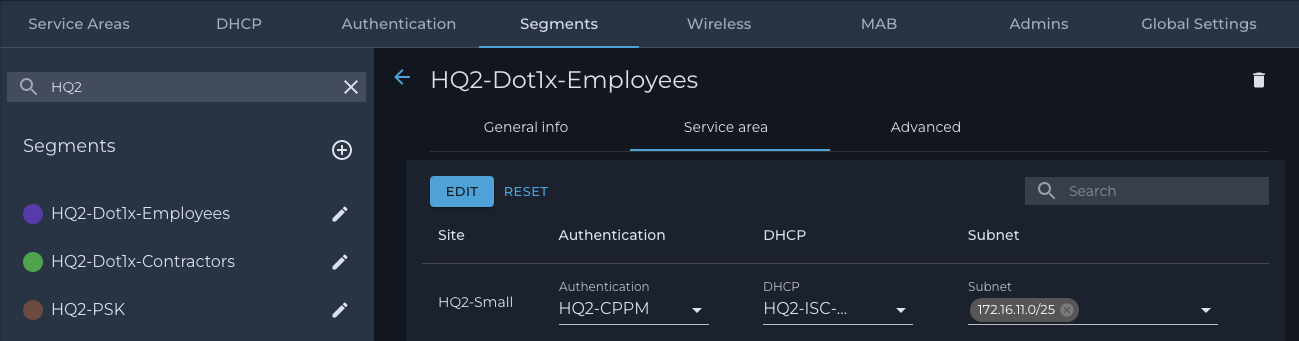
a. Navigate to the ‘Segments’ tab
b. Add the desired segments as illustrated below:
3. The 802.1x SSID
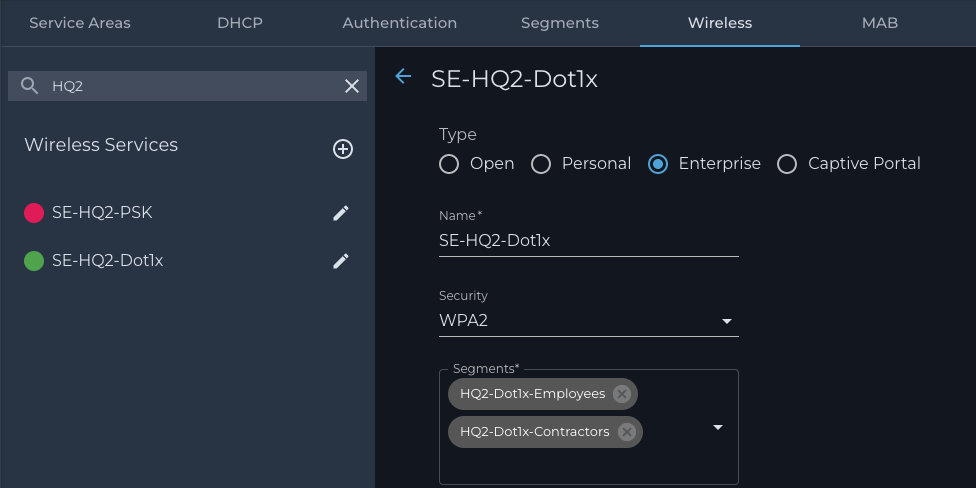
a. Navigate to the ‘Wireless’ tab.
b. Click on the ‘+’ sign to add a new SSID as illustrated below:

NOTE
Important Note: Adding two or more segments requires the radius server to return with the Access-Accept the Nile VSA ‘netseg’ with the appropriate segment name. [clarify]
1. Import the Nile Dictionary
XML Nile dictionary
Using a text editor, copy the following Nile dictionary in XML format and paste it to a file. In this example, the file is called CPPM-Nile-Dictionary.xml
The file is also available from the support site at:
https://nileglobalhelp.freshdesk.com/a/solutions/articles/66000496157
Import
The Nile dictionary in XML format is imported into ClearPass Policy Manager as follows:
a. Go to Administration > Dictionaries > RADIUS
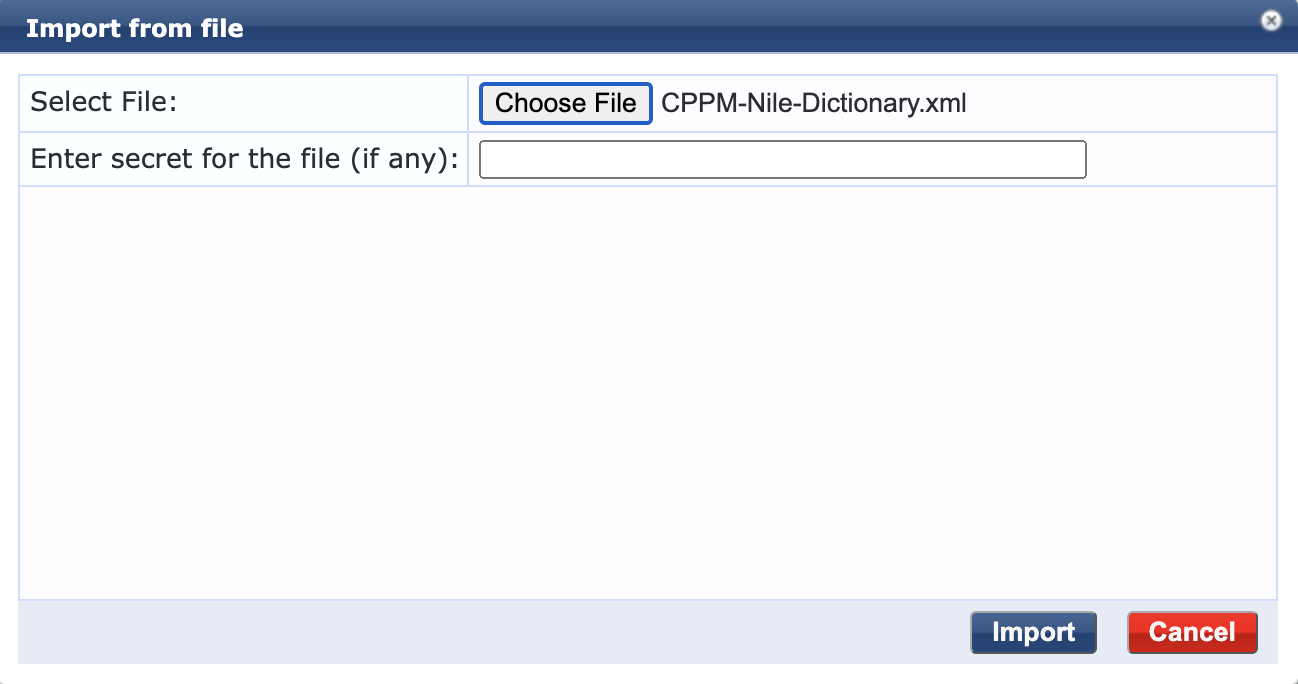
b. Click the ‘Import’ button to open the ‘Import from file’ window
c. Select the Nile dictionary XML file, and click on the ‘Import’ button
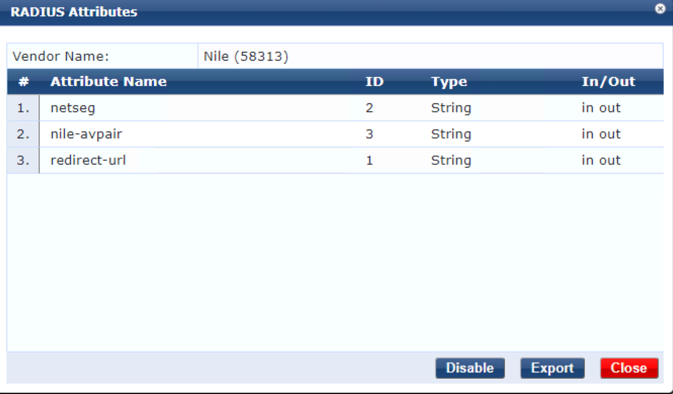
Once imported, the Nile dictionary attributes could be displayed by clicking the Nile dictionary:
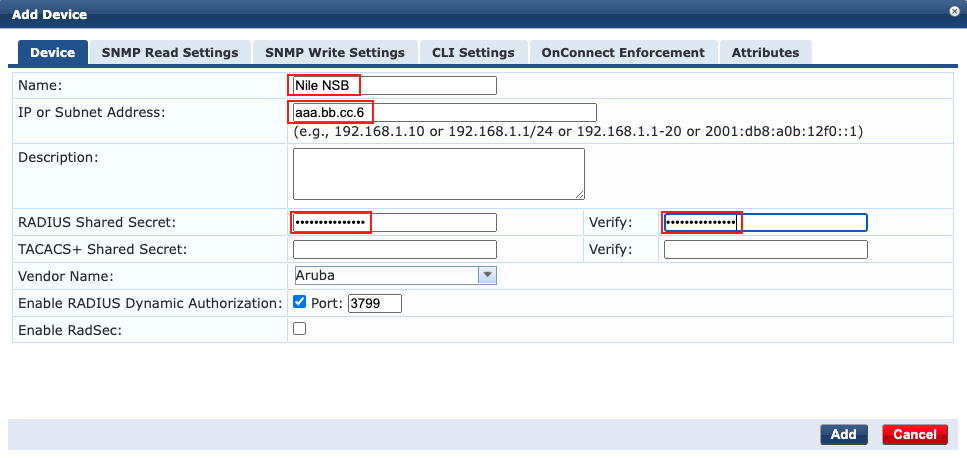
2. Add the Nile NSB as a Network Device
The NSB IP address communicating with ClearPass is typically of the format:
aa.bb.cc.6 if we assume the NSB subnet is aa.bb.cc.0/24.
In ClearPass Policy Manager:
a. Go to Configuration > Network > Devices
b. Click on ‘Add’ to open the ‘Add Device’ popup
c. Enter the following information, and click ‘Add’:
- c.1 Name:
- c.2 IP address
- c.3 Radius secret
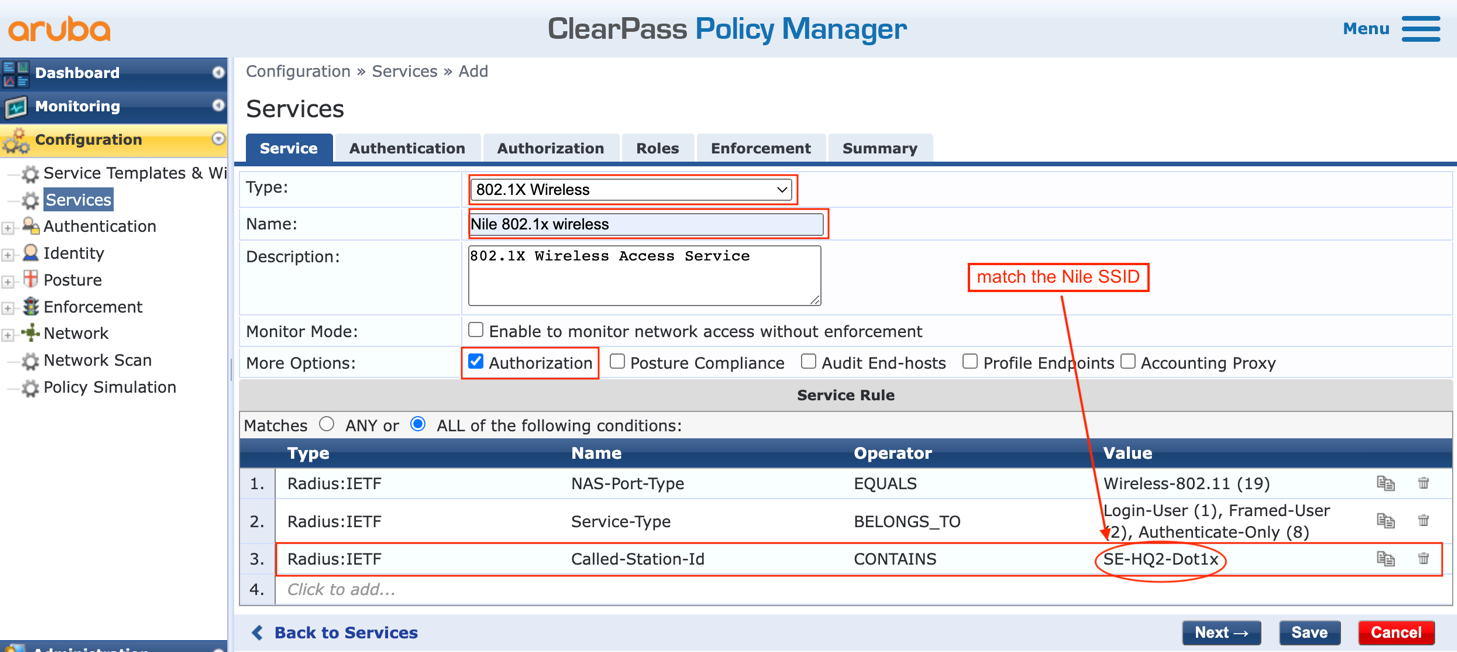
3. Create the 802.1x wireless service
In this document, the 802.1x wireless service will leverage the Active Directory server for the purpose of authentication and authorization of the Nile dot1x wireless clients.
Navigate to Configuration > Services:
a. Click on the ‘Add’ button, to add a new service.
b. Select the Type as ‘1X Wireless’.
c. Type a name for the new dot1x service. Example: Nile 802.1x wireless
d. Add a third service rule to the existing two rules to leverage the Nile SSID sent as part of the ‘Called-Station-Id’ attribute, where the string could be either the full SSID name or a subset as illustrated below:
e. Click ‘Next’ to move to the ‘Authentication’ tab to select the Authentication Methods and Sources:
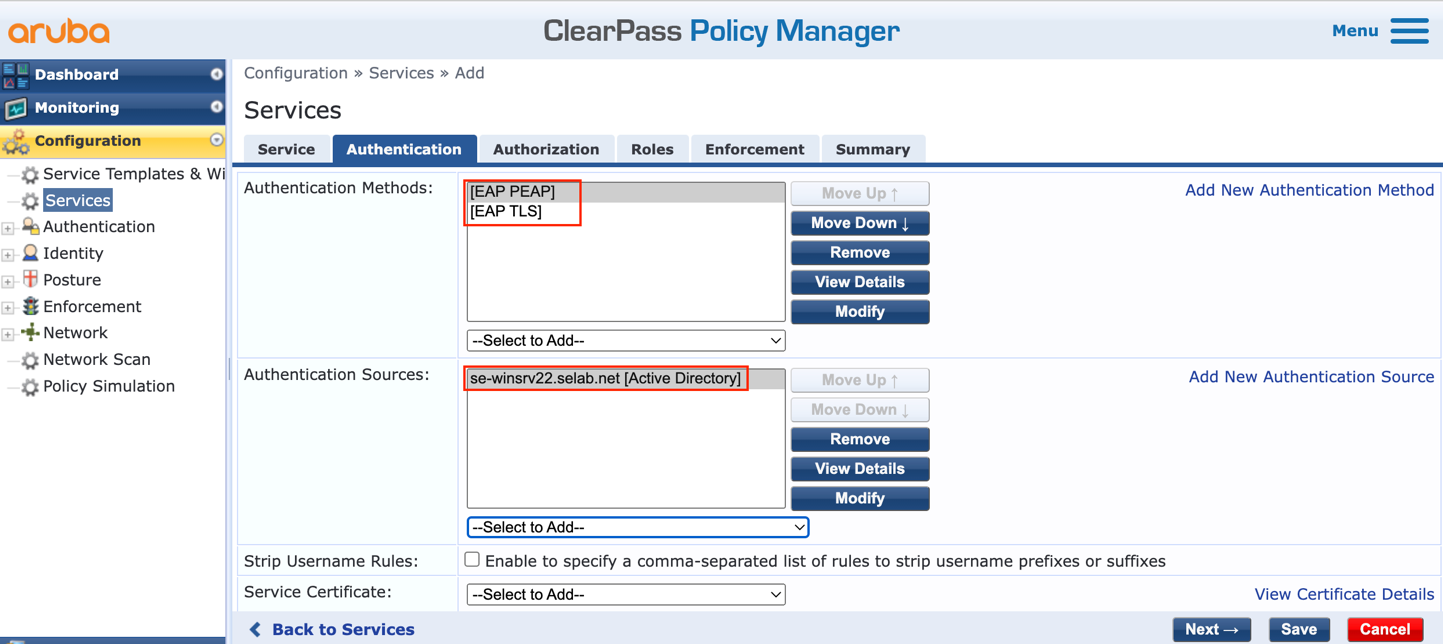
g. Validate that the correct AD entry is present:
f. Click ‘Next’ to move to the ‘Authorization‘ tab and validate that the AD entry is present:
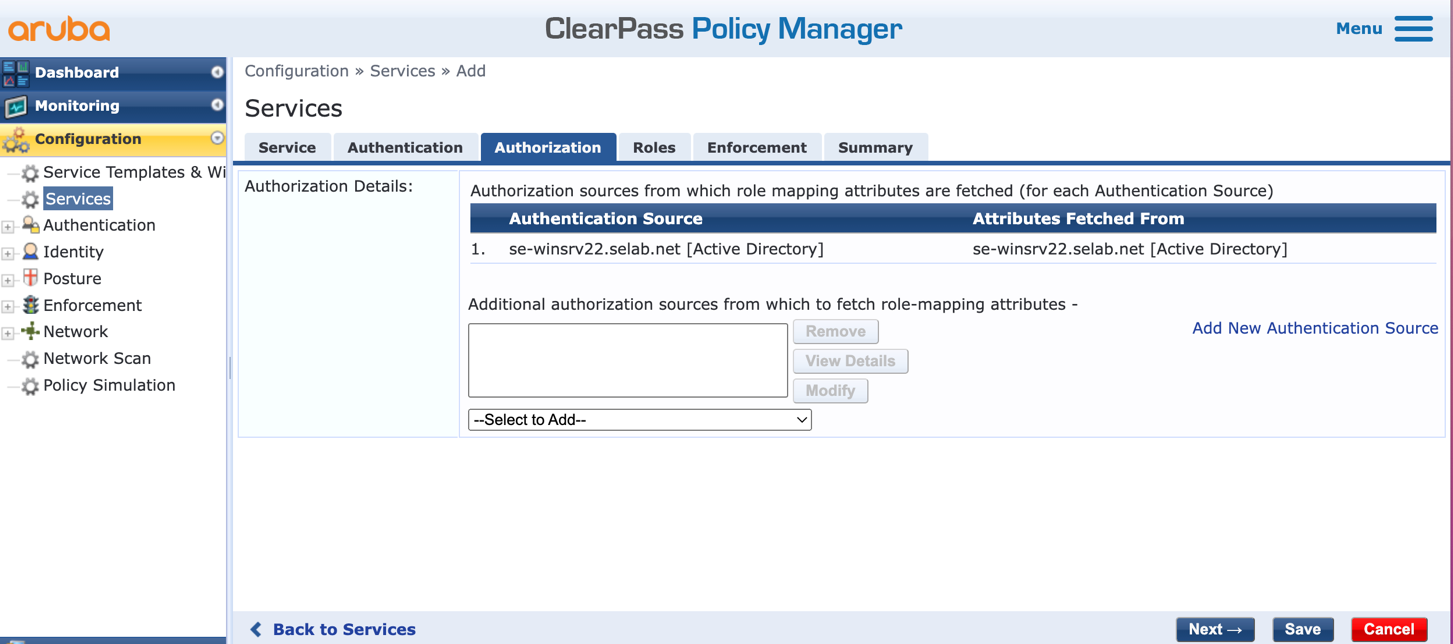
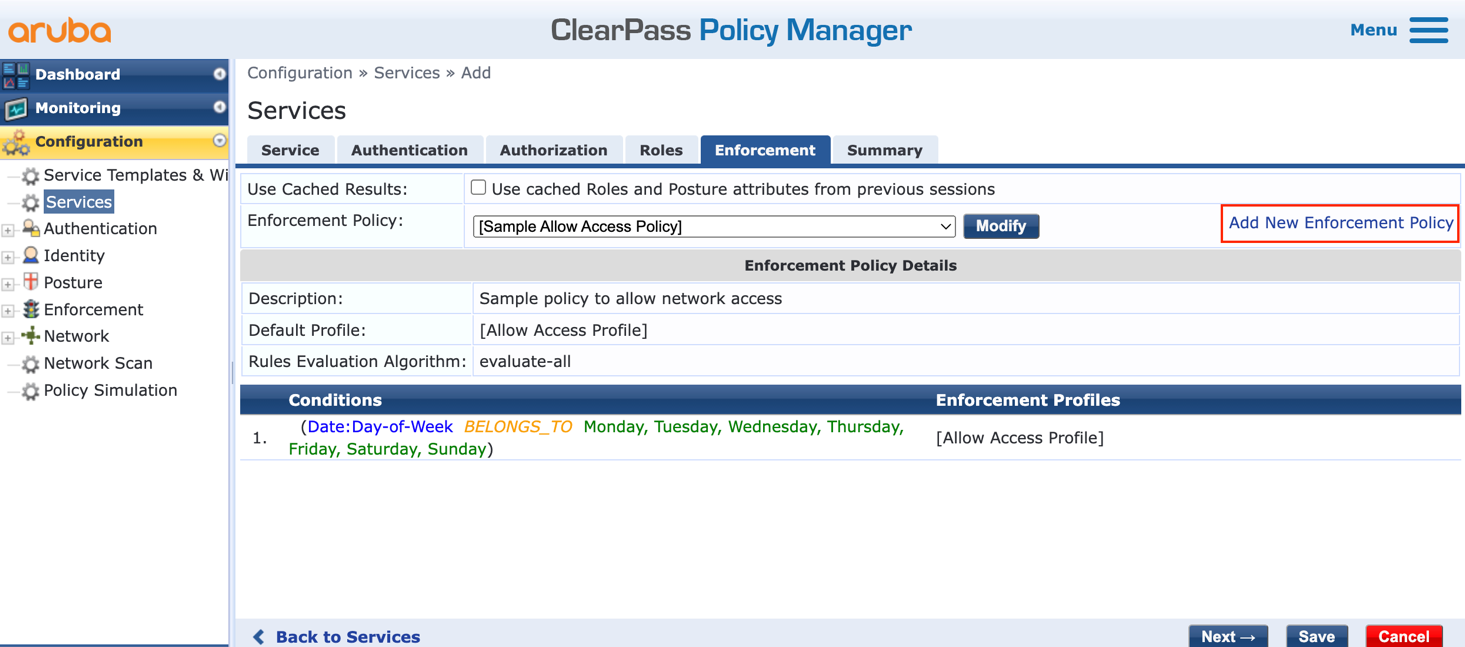
g. Click ‘Next’ twice to go to the ‘Enforcement‘ tab, and click on ‘Add New Enforcement Policy’:
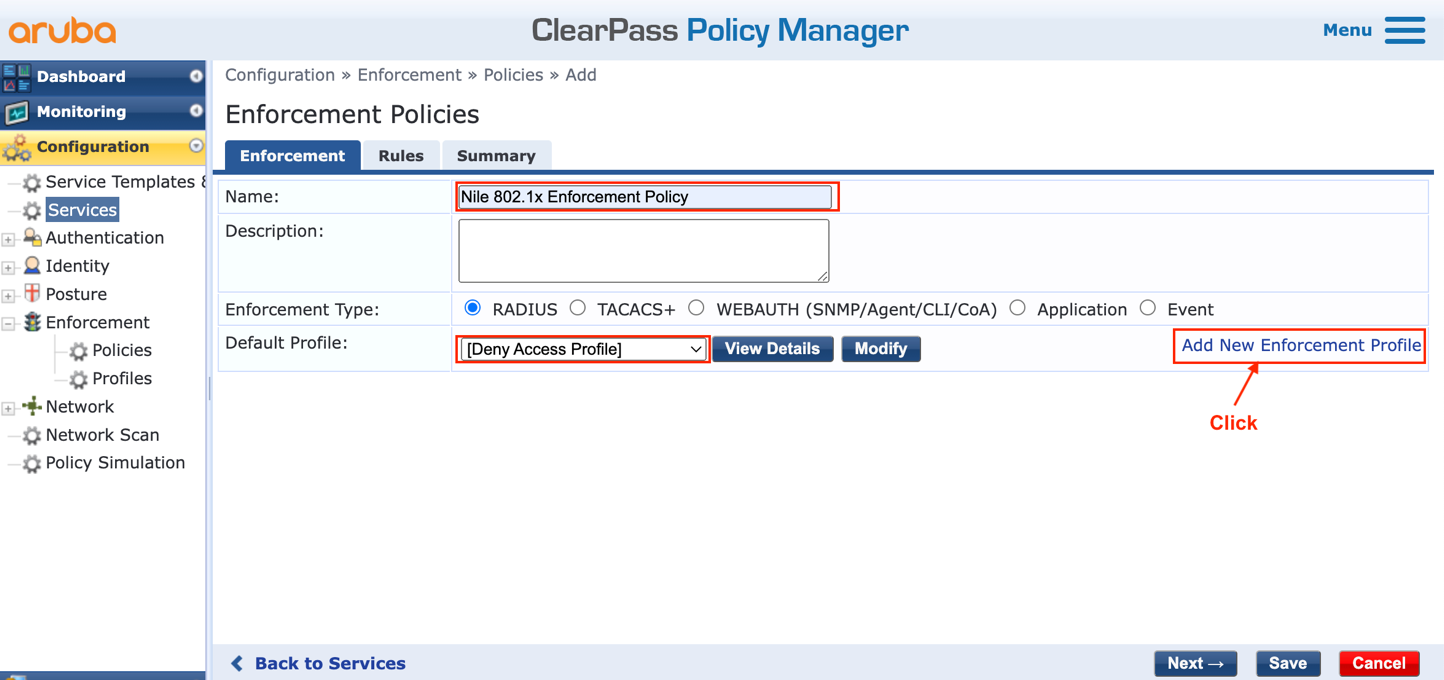
h. Fill up the new enforcement policy form:
- Type a ‘Name’: Nile 802.1x Enforcement Policy
- Select a ‘Default Profile’: [Deny Access Profile]
- Keep the ‘Enforcement Type’ as: Radius
- Click: ‘Add New Enforcement Profile’
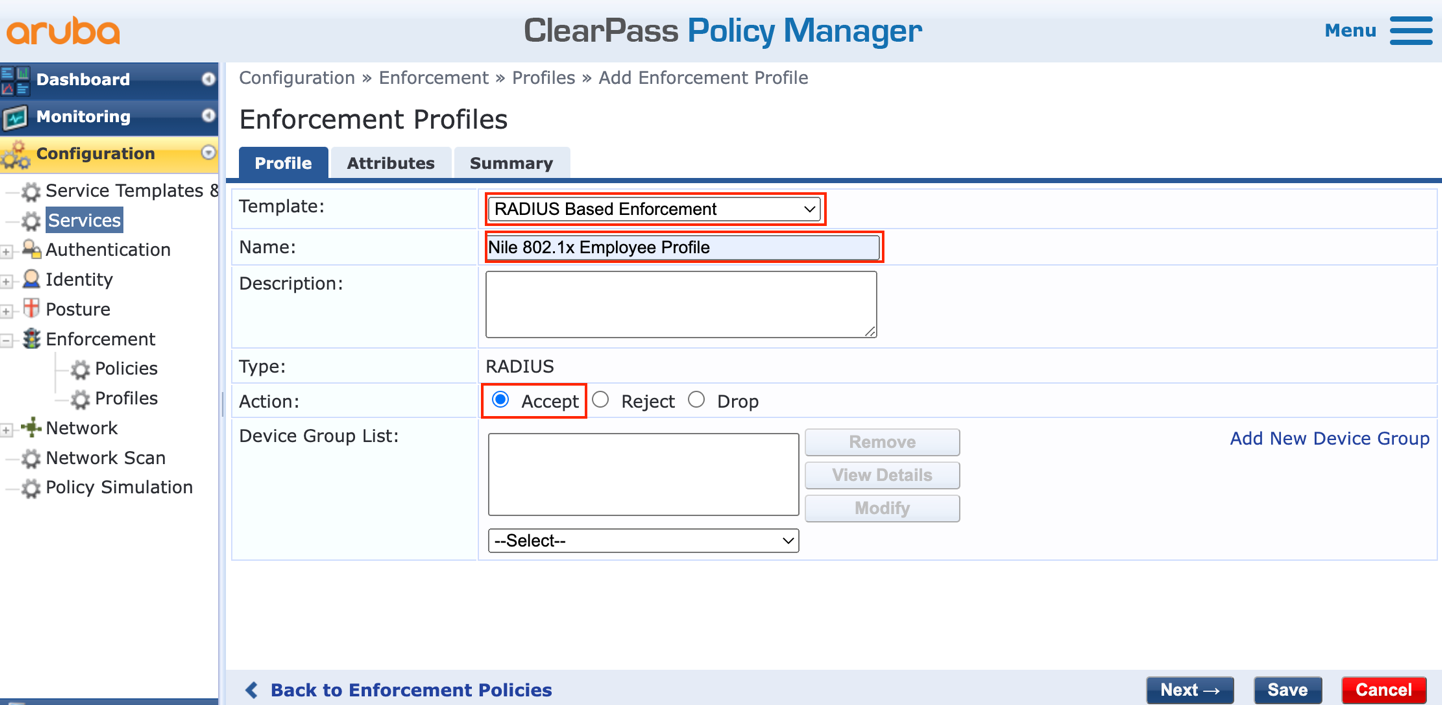
i. Fill up the form to create a new enforcement profile:
- Select the ‘Template’: Radius Based Enforcement
- Type a ‘Name’: Nile 802.1x Employee Profile
- Leave the ‘Action’ as: Accept
- Click ‘Next’
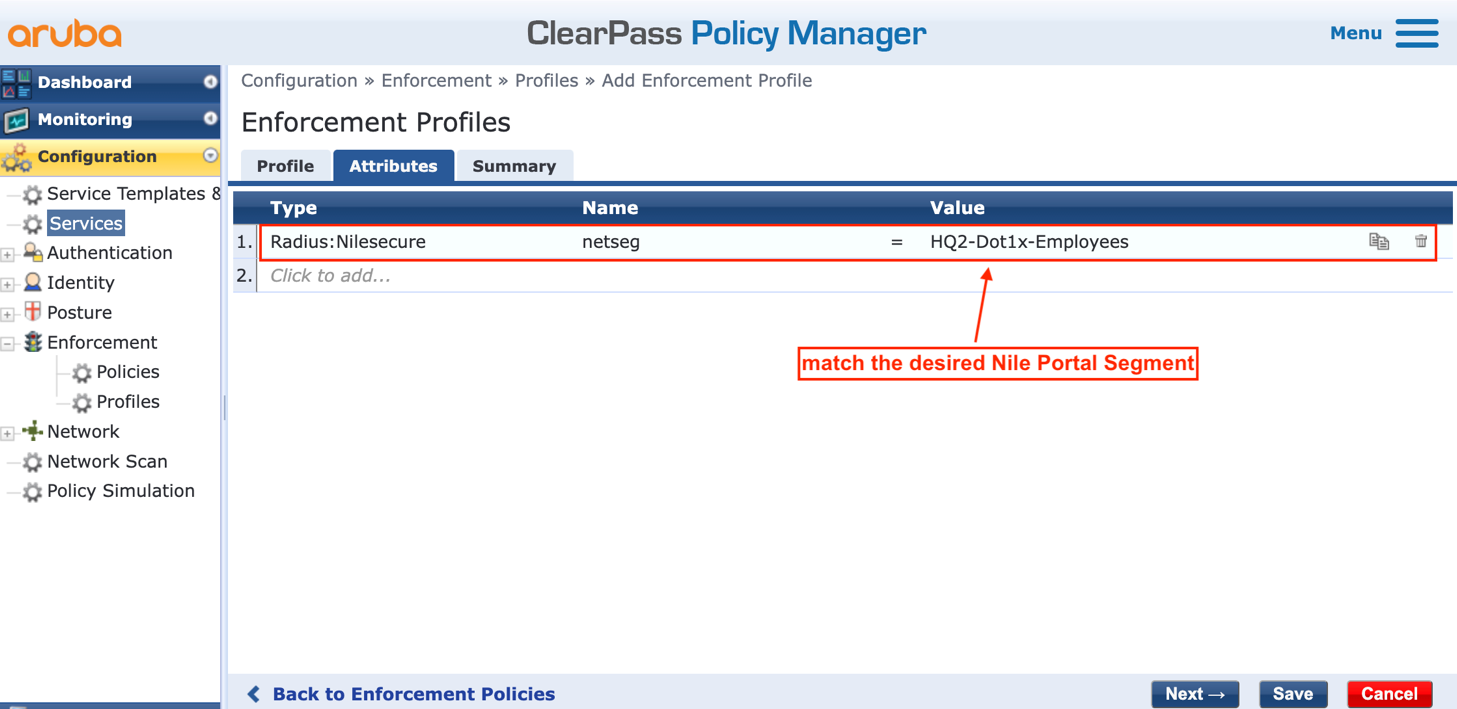
j. Fill up the Attributes form as follows:
- Type: Radius:Nile (the example shows Nilesecure dictionary)
- Name: netseg
- Value: type a string matching the desired Nile Portal Segment
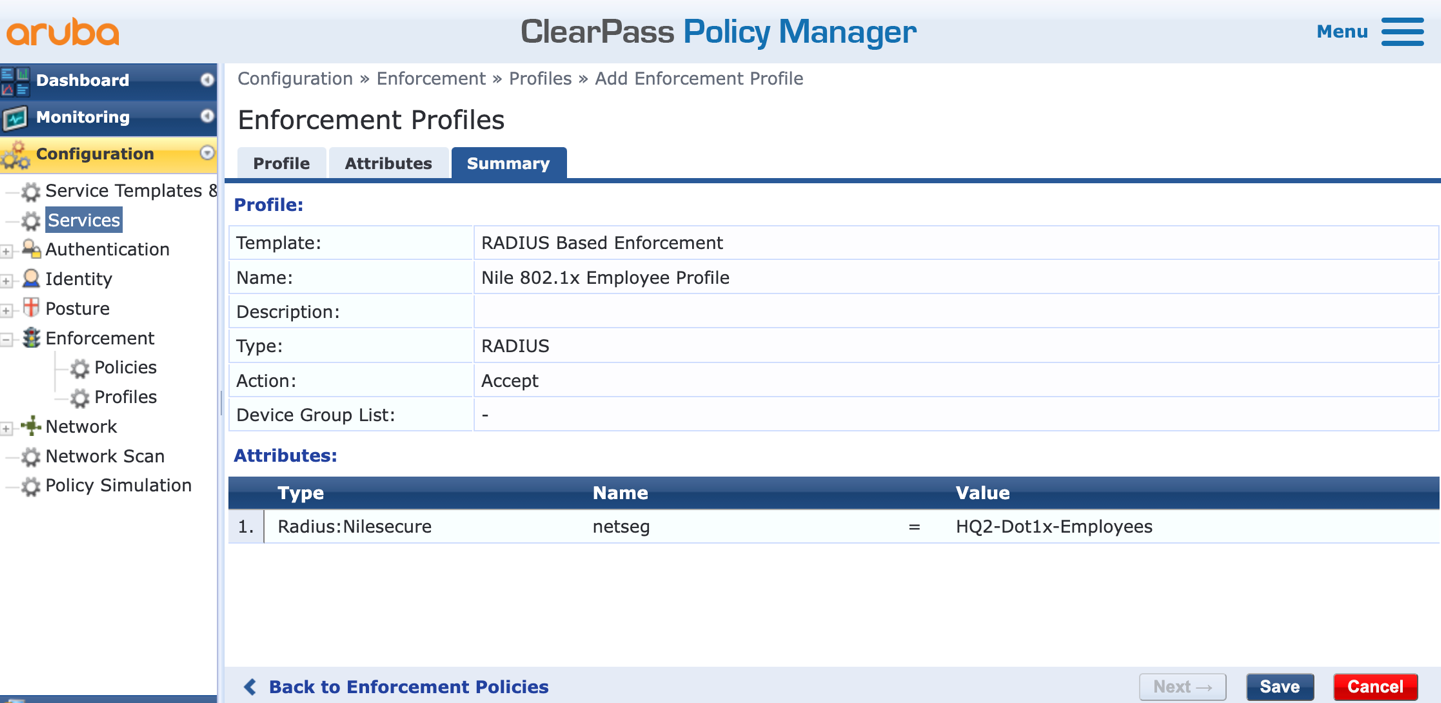
k. Click ‘Next’ to display the Summary, and then press ‘Save’ to save the first of two enforcement profiles needed in this document:
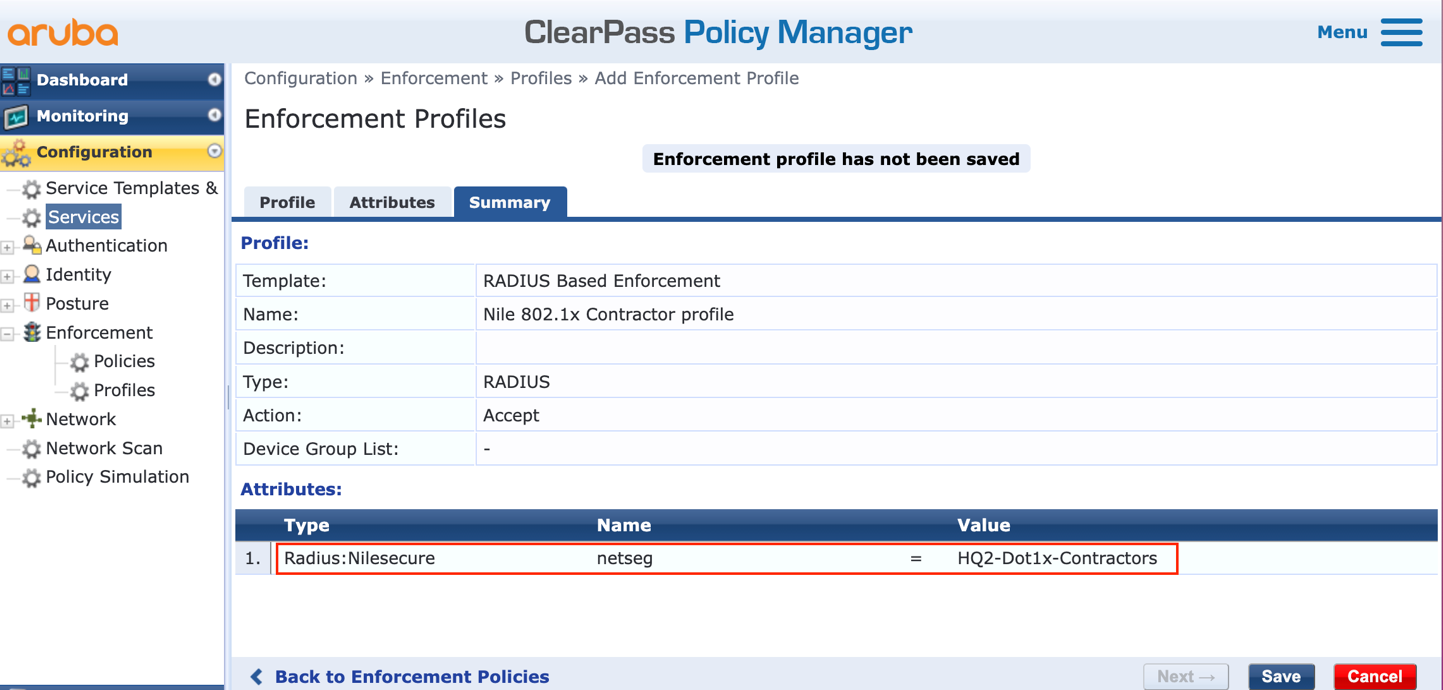
l. Repeat steps i to k to create the second enforcement profile, where an illustration of the Summary is as shown below:
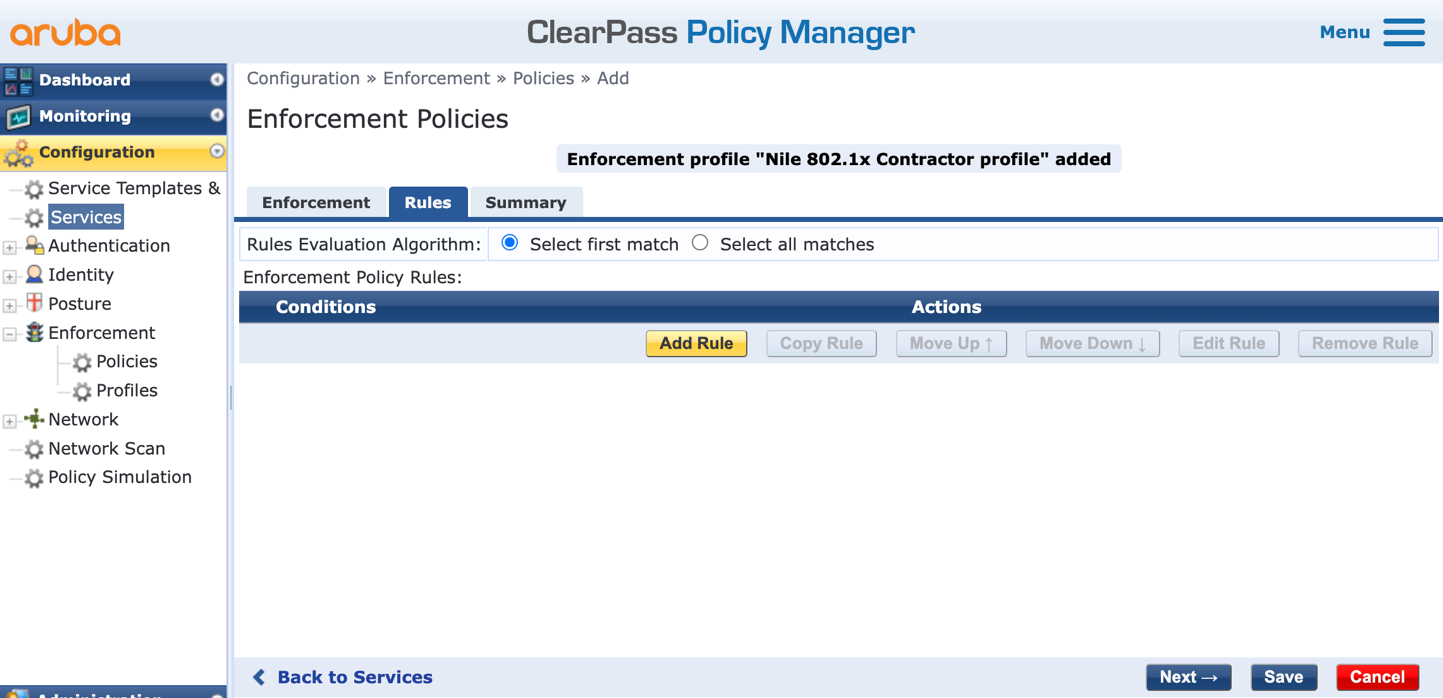
m. The next step is to add two rules to complete the ‘Nile 802.1x Enforcement Policy’ by pressing the ‘Add Rule’ button:
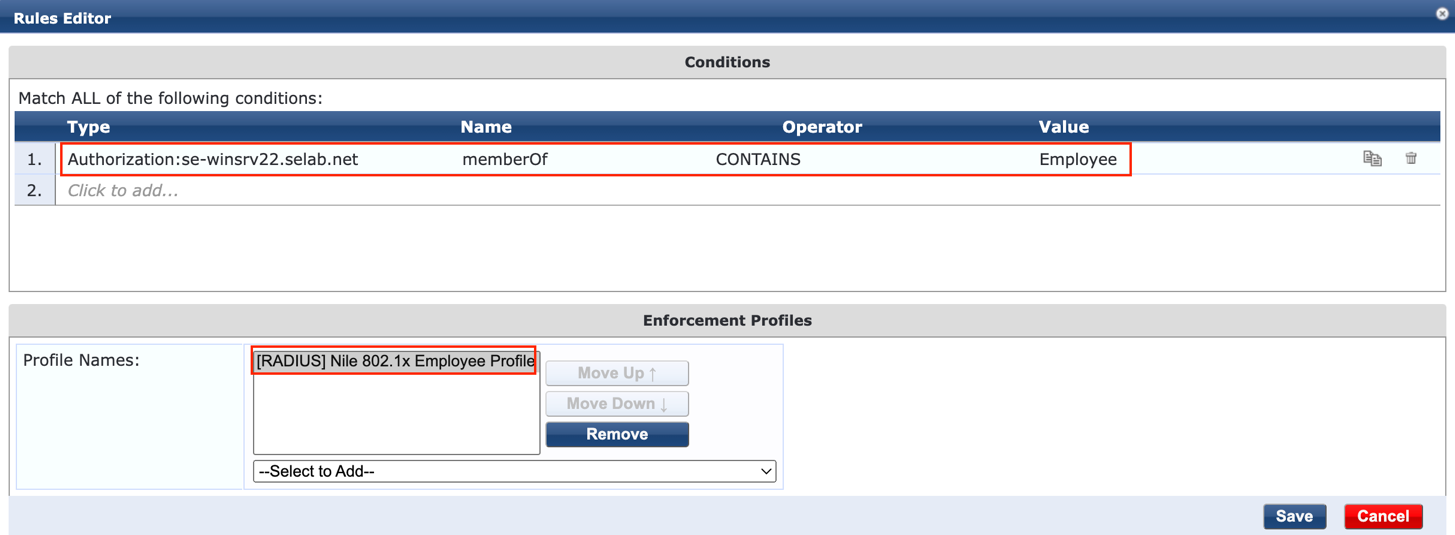
n. Fill up the conditions by selecting the following, and press ‘Save’ when done:
- Type: Authorization:
- Name: memberOf
- Operator: Contains
- Value: (‘Employee’ in this example)
- Profile Names: Nile 802.1x Employee Profile
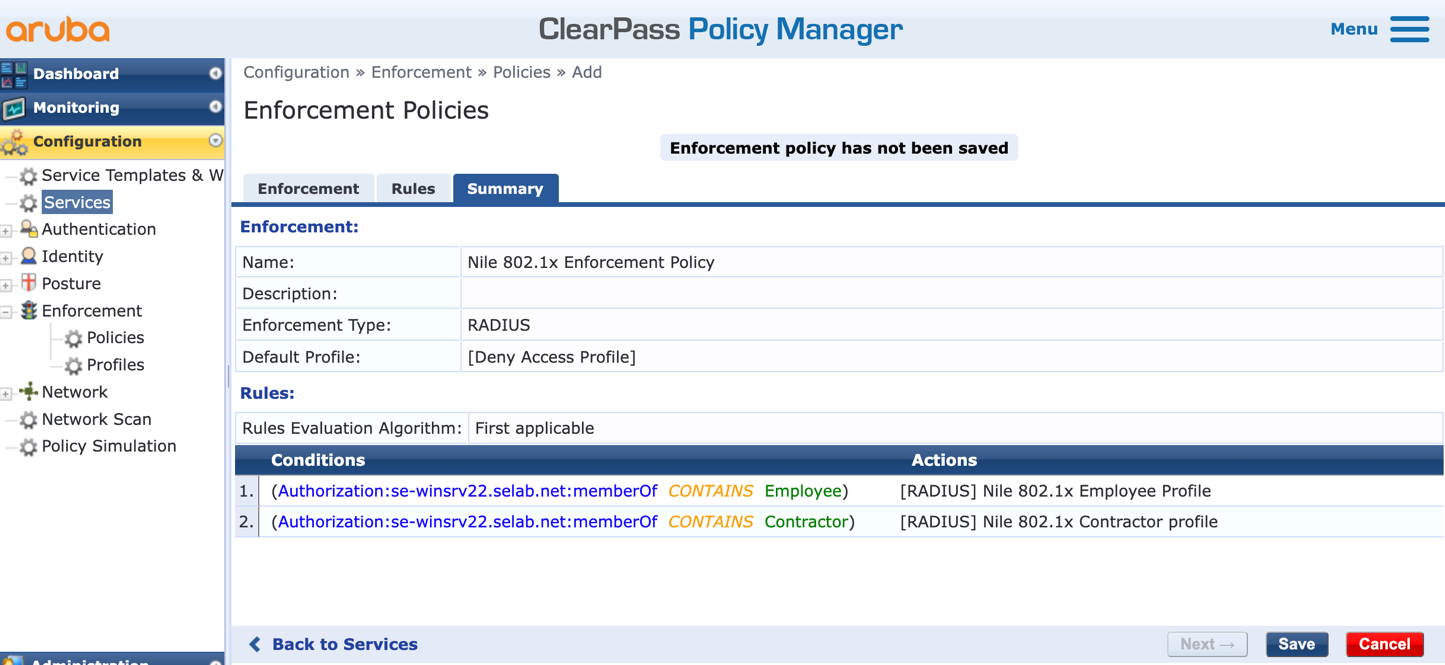
o. Repeat the previous step to add a second rule for ‘Contractors’. Once both rules are in place, press ‘Next’ to display the summary, and then press ‘Save’ to complete the creation of the “Nile 802.1x Enforcement Policy’:
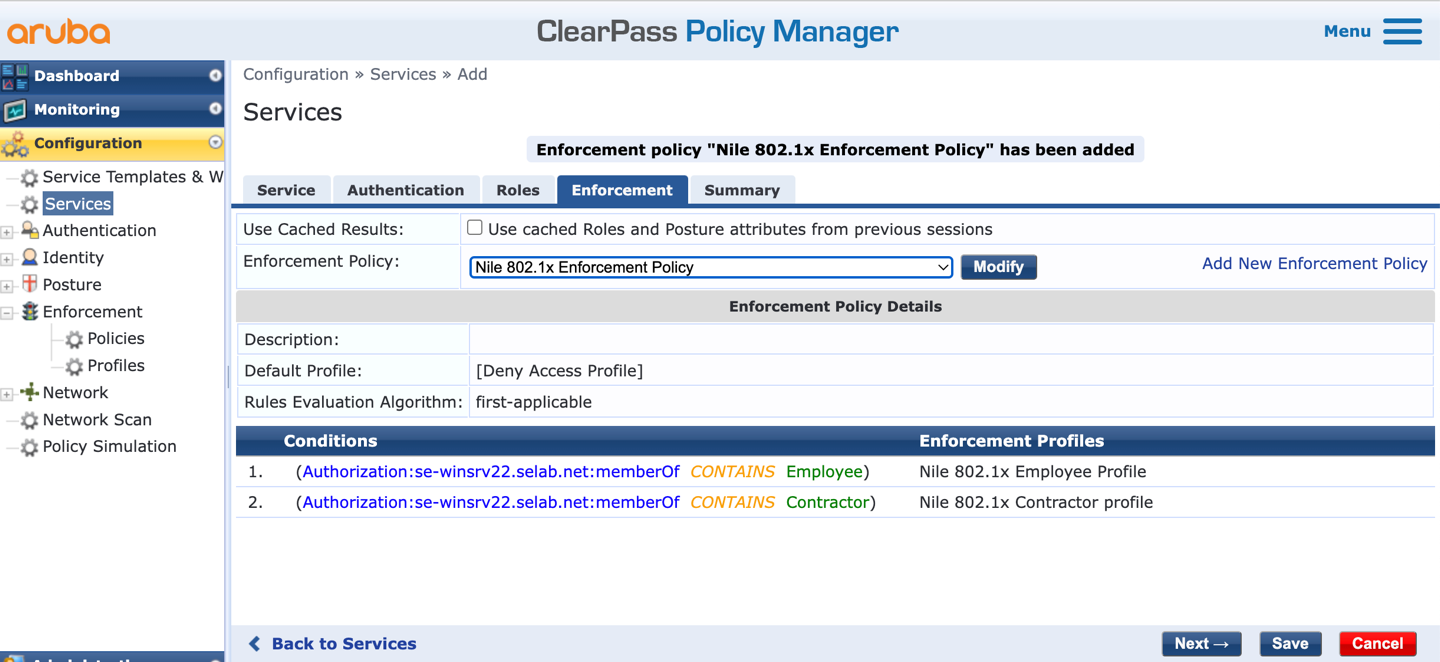
p. Once back to the Services > Enforcement page, press the ‘Modify’ button to select the Enforcement policy completed in the previous step: ‘Nile 802.1x Enforcement Policy’:
q. Press the ‘Next’ button to review the Summary of the new service ‘Nile 802.1x wireless’:
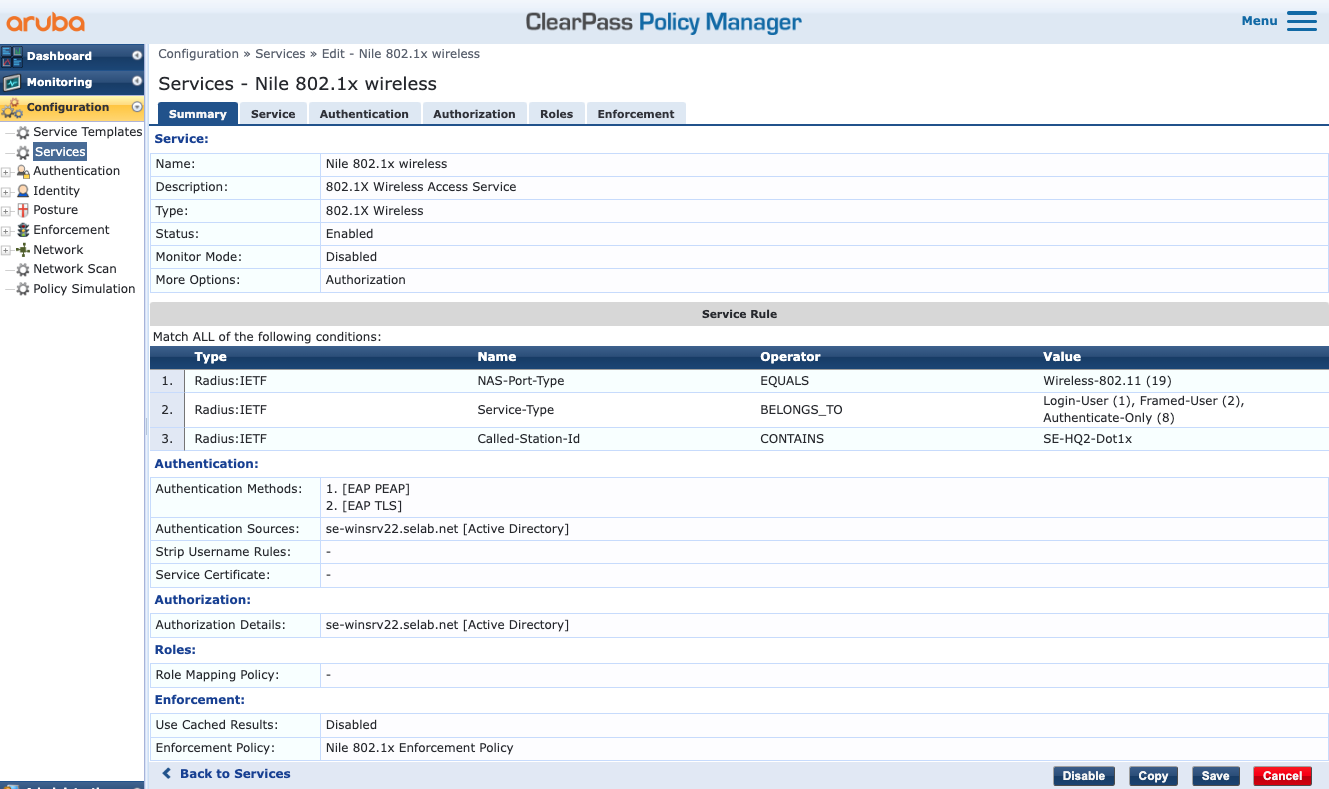
r. Press the ‘Save’ button to complete the creation of the ‘Nile 802.1x wireless’ service.
s. It is recommended to reorder this service and move it up the list of ClearPass services as needed.
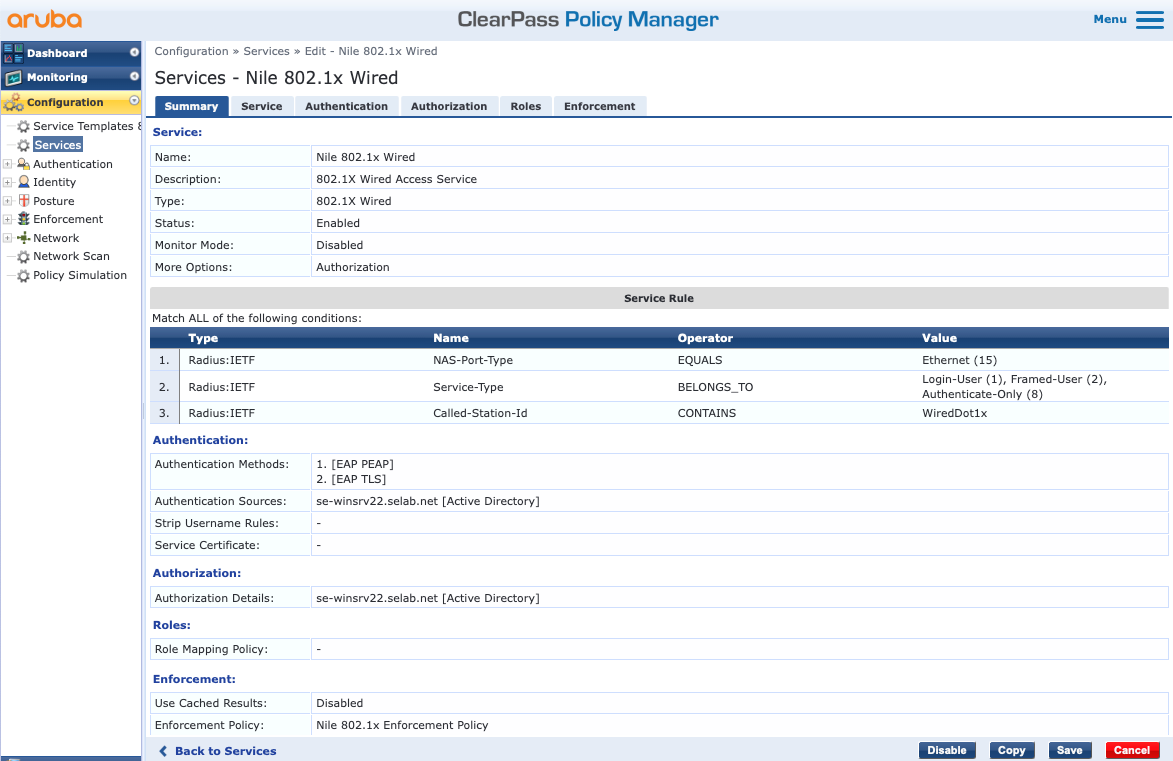
4. Create the 802.1x wired service
The 802.1x wired service configure is very similar to the wireless dot1x service and will also leverage the Active Directory server for the purpose of authentication and authorization of the Nile dot1x wired clients.
Navigate to Configuration > Services:
a. Click on the ‘Add’ button, to add a new service.
b. Select the Type as ‘1X Wired’.
c. Type a name for the new dot1x service. Example: Nile 802.1x wired
d. Add a third service rule to the existing two rules to leverage the Nile string sent as part of the ‘Called-Station-Id’ attribute, where the string should contain “WiredDot1x” as shown below:

e. Follow the guidance in the previous section to configure the rest of the tabs and create the service:
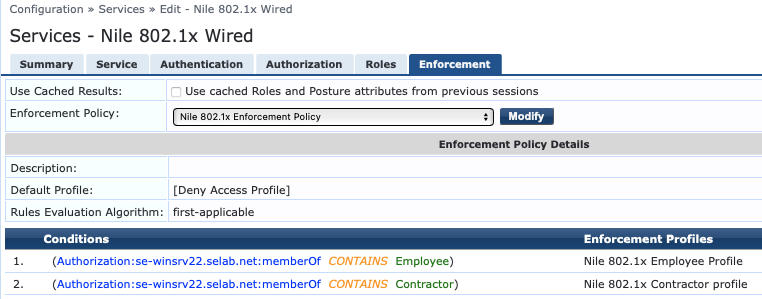
NOTE
Note: Unlike the 802.1x wireless service, it is imperative that the Enforcement Policy returns the Nile ‘netseg’ attribute with a value that reflects the Nile segment where the dot1x wired user would acquire a DHCP IP address from, as illustrated below:
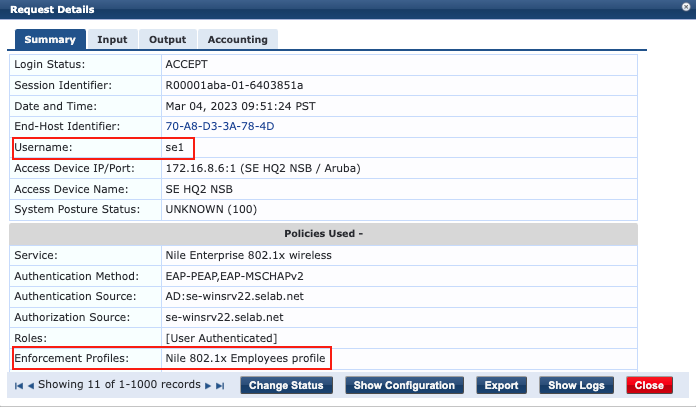
1. se1 connection test
A connection of a client machine to the Nile ‘SE-HQ2-Dot1x’ SSID with the se1 user credentials results in the client receiving an IP address from the ‘HQ2-Dot1x-Employees’ segment, when ClearPass Policy Manager returns the Nile attribute ‘netseg’ with the segment name as illustrated by ClearPass Access Tracker:
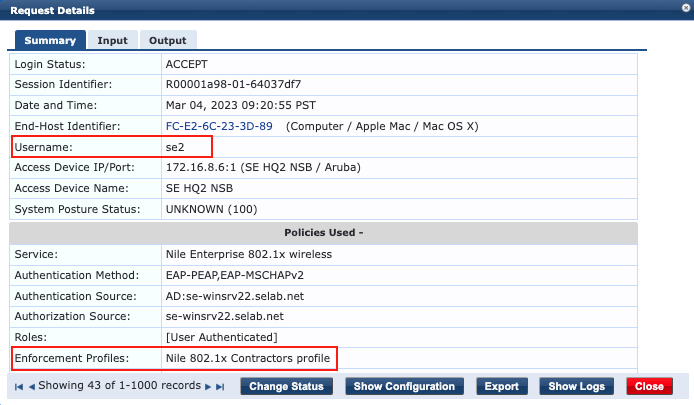
2. se2 connection test
A connection of a client machine to the Nile ‘SE-HQ2-Dot1x’ SSID with the se2 user credentials results in the client receiving an IP address from the ‘HQ2-Dot1x-Contractors’ segment, when ClearPass Policy Manager returns the Nile attribute ‘netseg’ with the segment name as illustrated by ClearPass Access Tracker: