
Configuring Nile Authentication Server (RADIUS)
- Log onto Nile Portal: https://u1.nile-global.cloud/
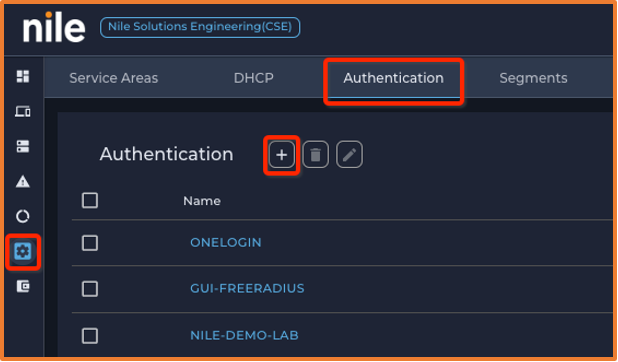
- Navigate to Nile Portal ® Settings button ® Authentication tab
- Click on the + (add authentication button) to create a new Microsoft NPS RADIUS authentication configuration:
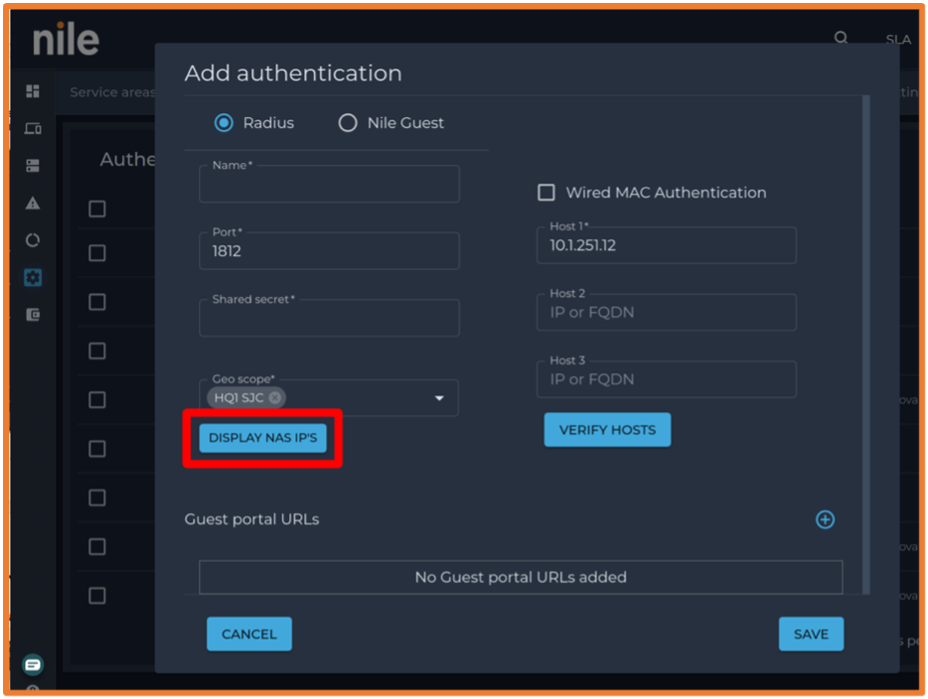
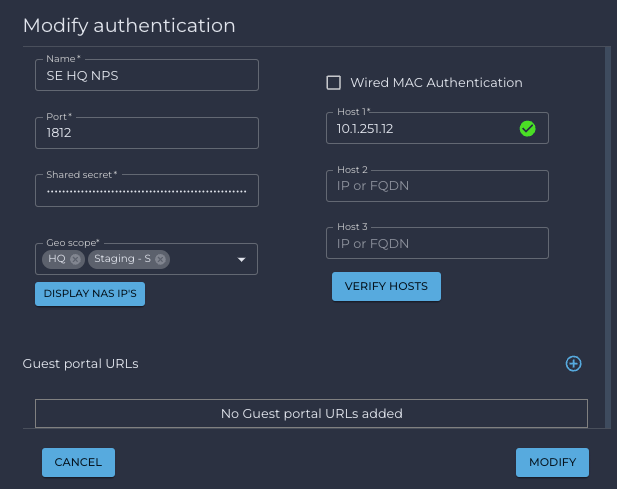
- Fill in the Microsoft NPS server information:
- RADIUS server Name (Any name example SE HQ NPS)
- Up to three RADIUS IP addresses
- RADIUS Authentication Port; default 1812/UDP
- RADIUS Shared secret (pre-shared key that need to same NPS client pre-shard key)
- Nile Geo scope (Site): Nile supports one RADIUS server per Geo scope.
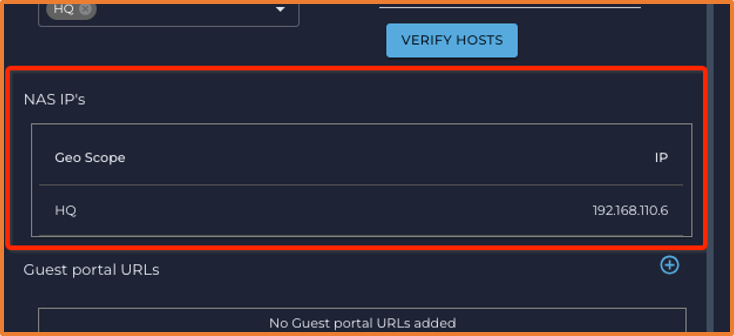
- Click on DISPLAY NAS IP’S to get Nile Service Block NAS IP address that need to be added as Microsoft NPS client.
- The result is shown in the entry panel:
- Click on Save and verify the server added to the Authentication device list

Configuring NPS Server
- Go to Windows → Run → MMC
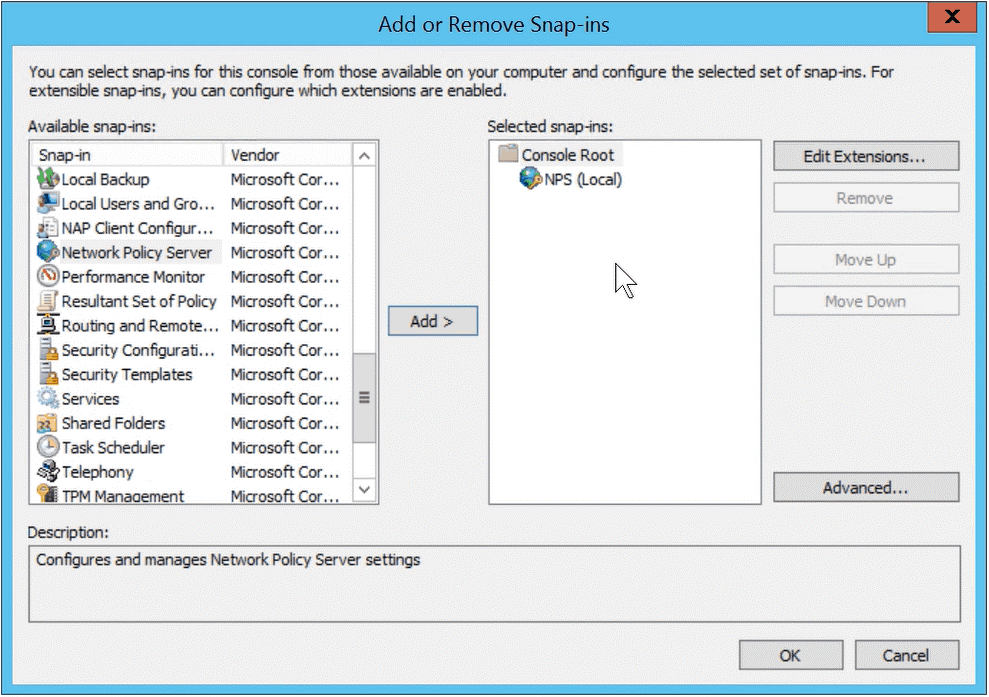
- In the Console, navigate to File → Add/Remove Snap-in
- In the Add/Remove Snap-in window, select Network Policy Serverfrom the “Available snap-ins” window, and click the Add button
- In the Select Computer window, select “Local Computer”
- Click the OK button
- In the Add/Remove Snap-in window, click the OK button
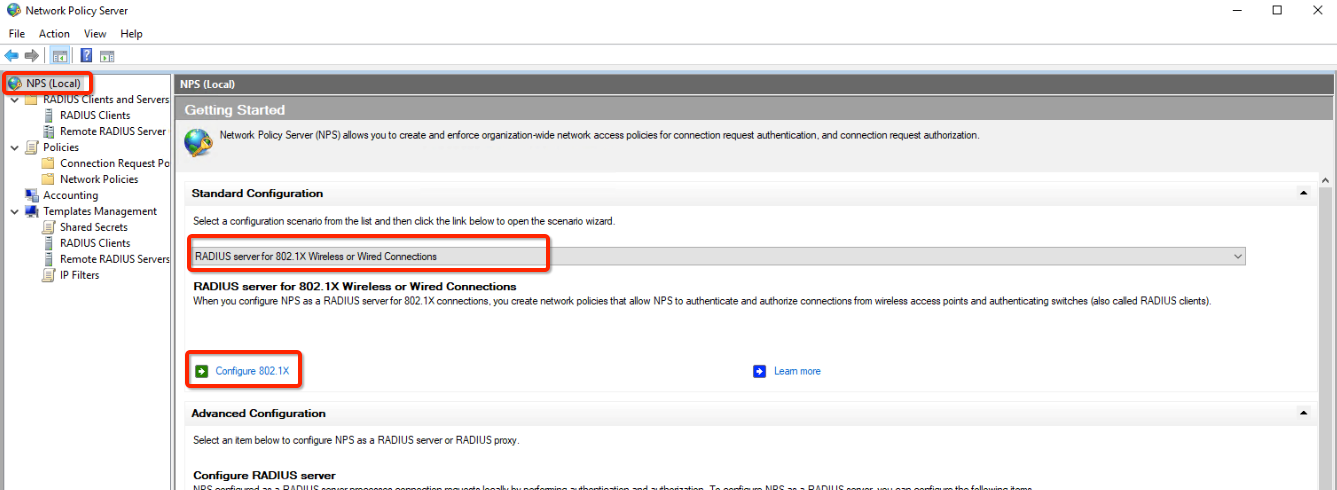
- In the Console, navigate to NPS (Local) side menu
- In the “Standard Configuration” panel, select “RADIUS server for 802.1x Wireless or Wired Connections” from the pull-down list
- Click on “+ Configure 8201.X” link: this launches the 802.1x configuration wizard.
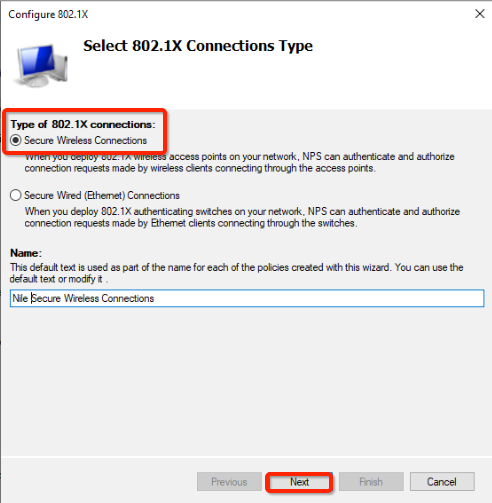
- Select Secure Wireless Connections radio button
- Add “Nile” to the beginning of the name
- Click the Next button
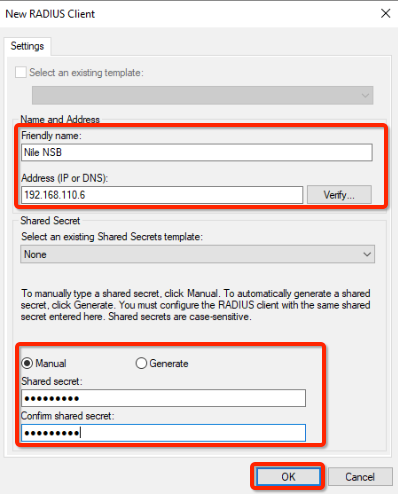
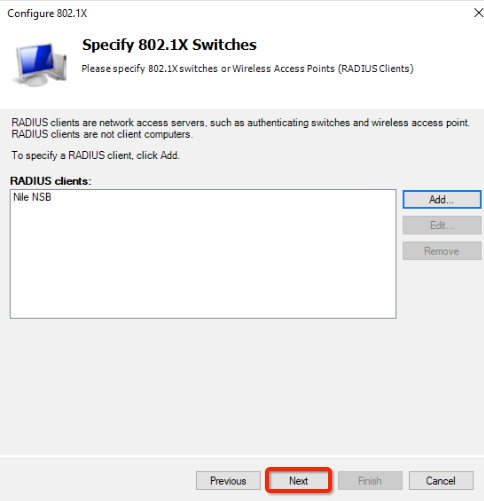
- Click the Add… button to add Nile RADIUS client
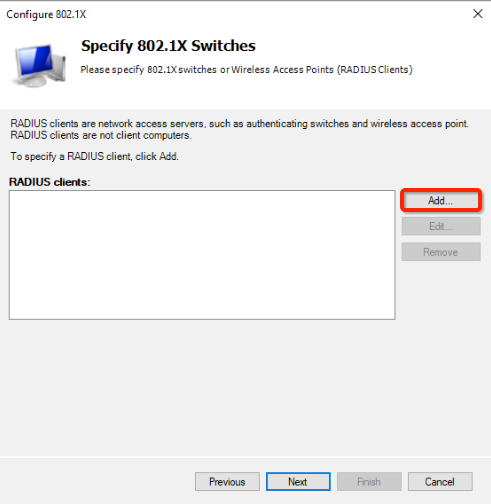
- Use “Nile NSB” as the Friendly name
- Fill in “Address (IP or DNS)” with the NAS IP address provided by the Nile Portal
- Click the Manual radio button
- Enter the secret that matches the one in the Nile Portal Authentication settings.
- Click on OK button
- This policy example allows only domain users;, to add these three conditions
click the Next button
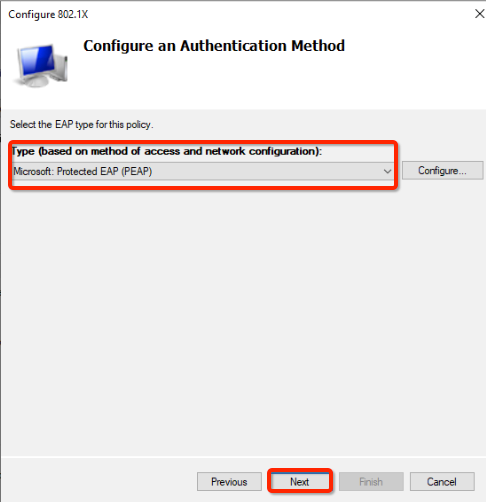
- Select Authentication Type – Microsoft: Protected EAP (PEAP) and click on Next
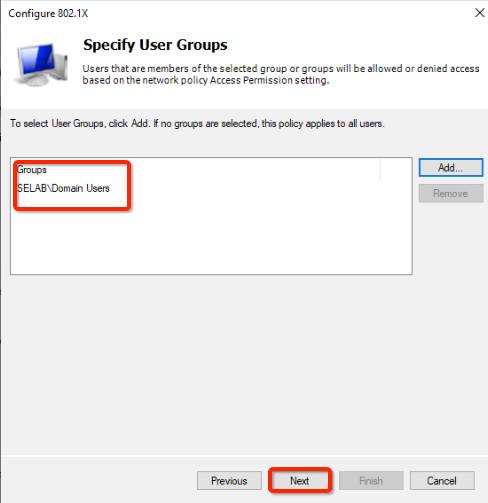
- Windows Groups – select user groups for the policy. In our example, we will select “Domain Users” groups. Then click on Next.
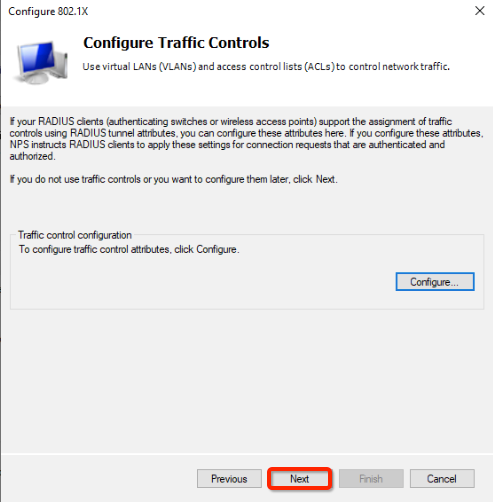
- For traffic controls, just click on the Next button to use default configurations.
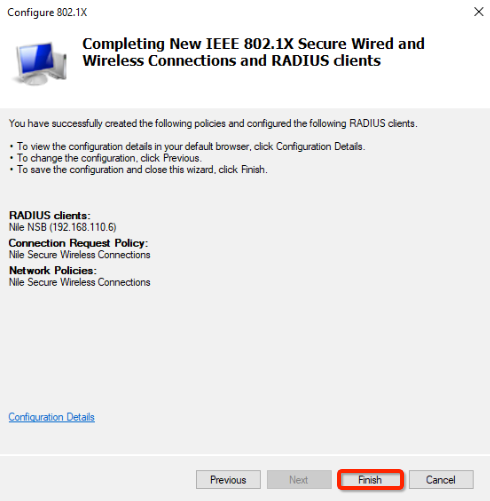
- Click on the Finish button to apply the setting.
Note: This is just an example. You can modify the policy to meet your requirements.
For Machine Authentication or user authentication using a certificate, please select “Microsoft: Smart Card or other certificates.”
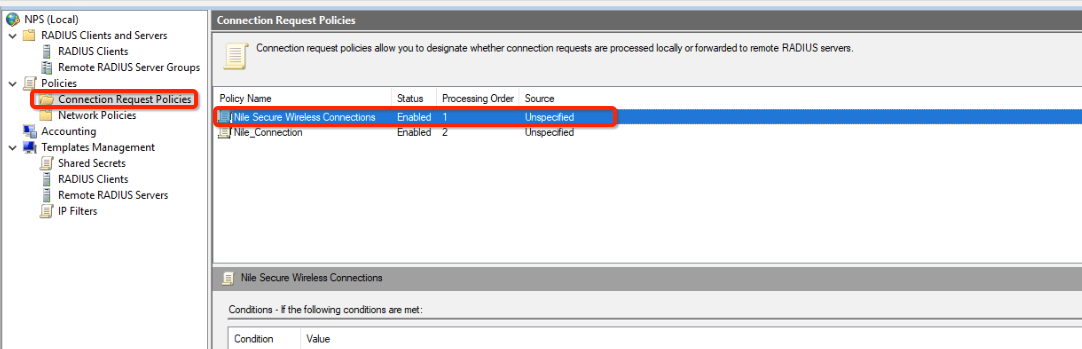
- In the left-hand menu, under “Policies” select “Connection Request Policies”
- Click the entry “Nile Secure Wireless Connections”.
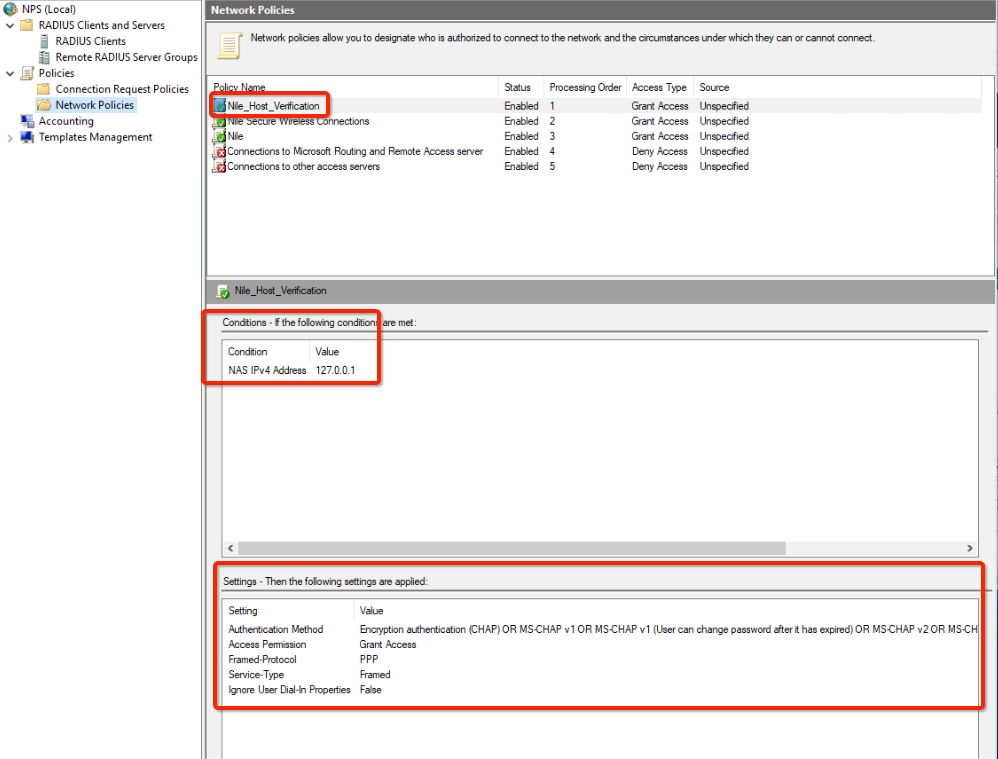
- In the left-hand menu, under “Policies”, select “Network Policies”.
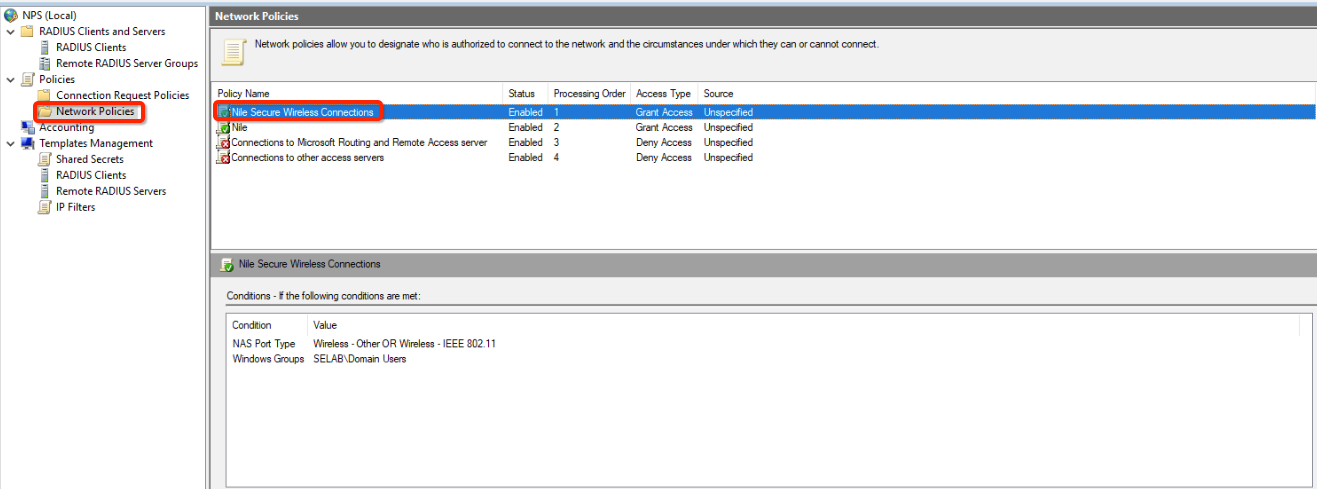
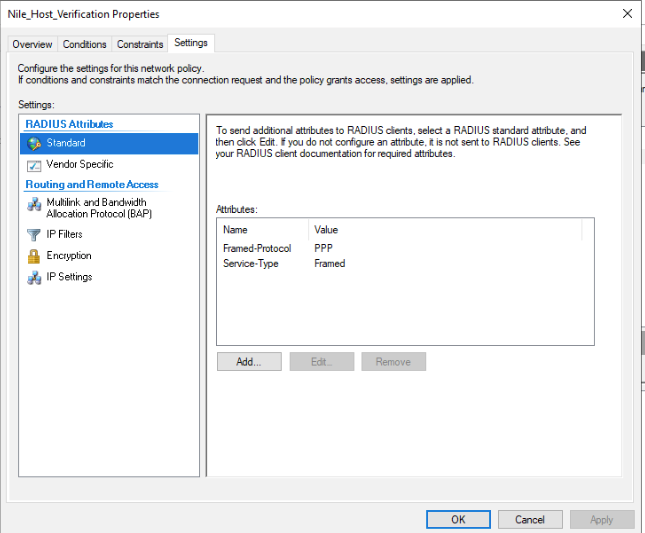
- Verify the information as shown.
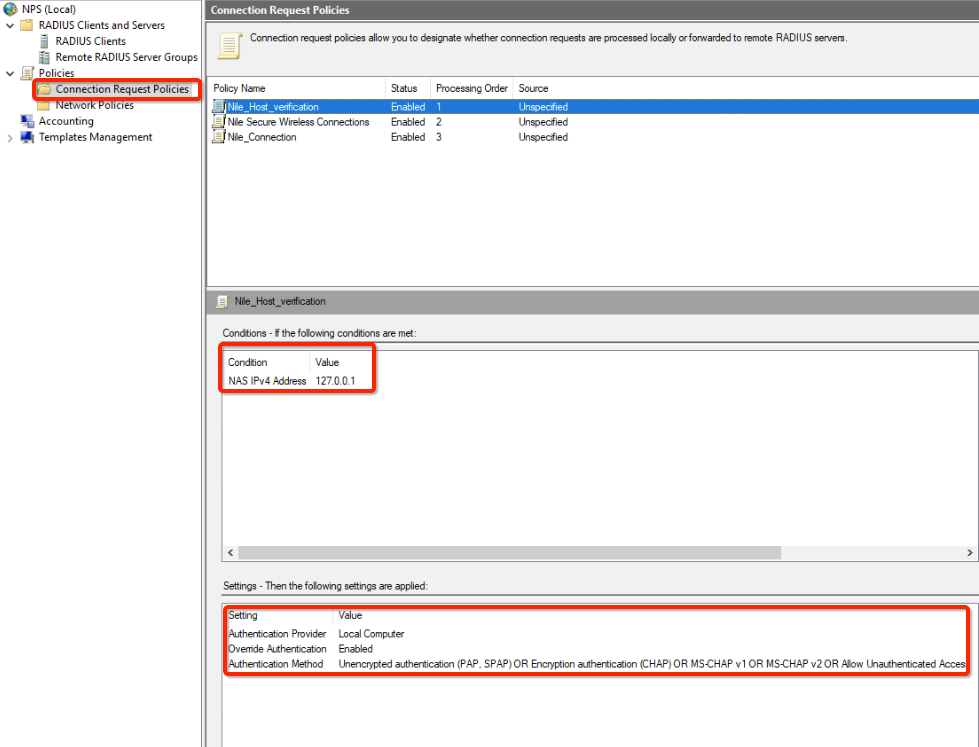
RADIUS Service Monitoring and Troubleshooting
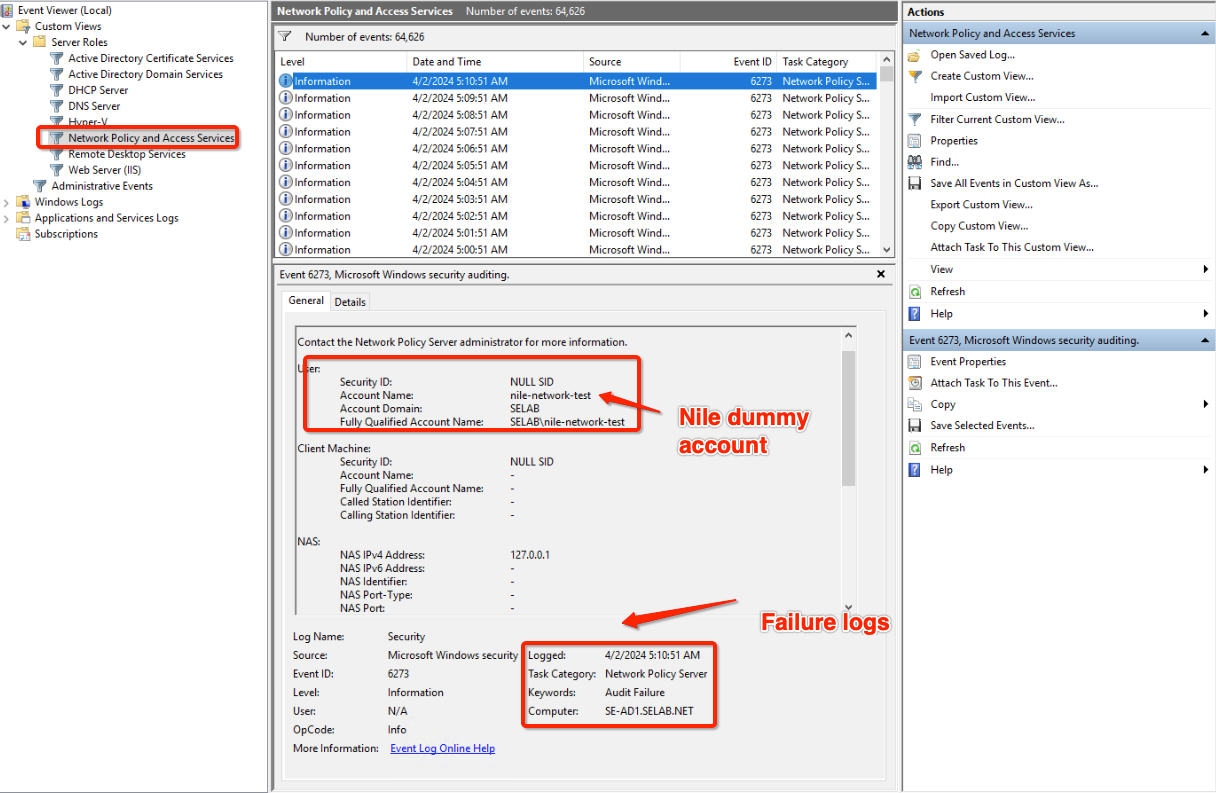
- Nile supports RADIUS transaction monitoring for service availability, For monitoring, Nile will send an authentication request with a dummy user account “user name nile-network-test”, RADIUS will respond with a rejection which confirms RADIUS service is available.
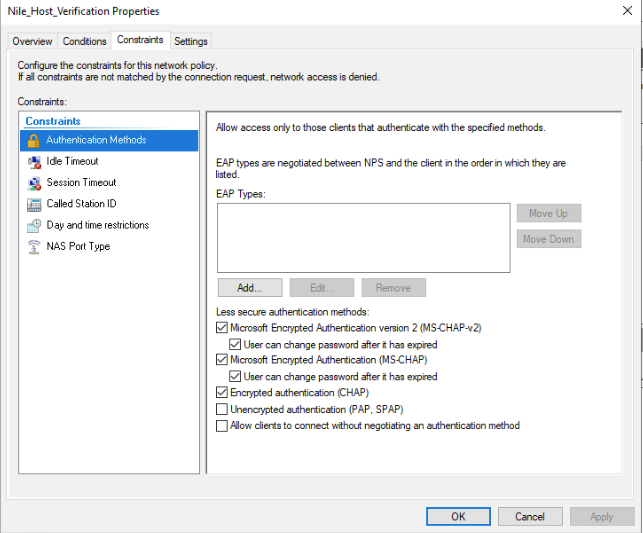
- An administrator has the option to use an active directory user for monitoring or can run a one-time verification for troubleshooting only, Nile supports MS-CHAPv2 for RADIUS monitoring and requires an NPS policy for verification.
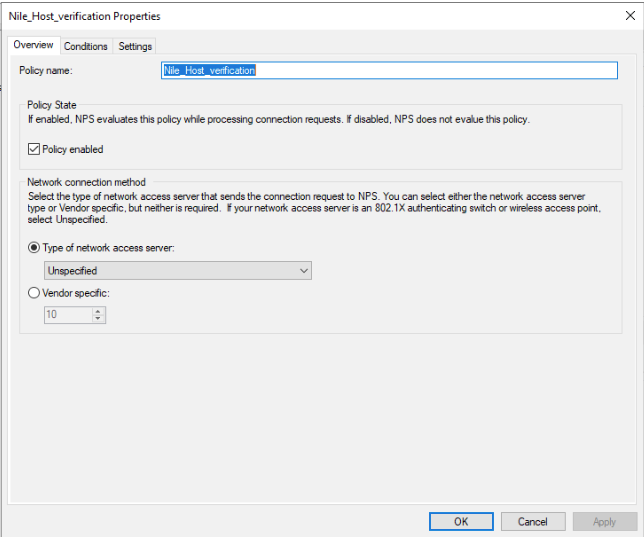
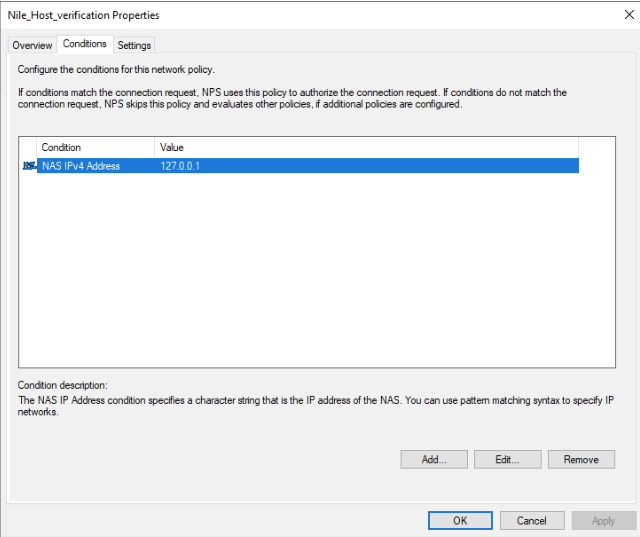
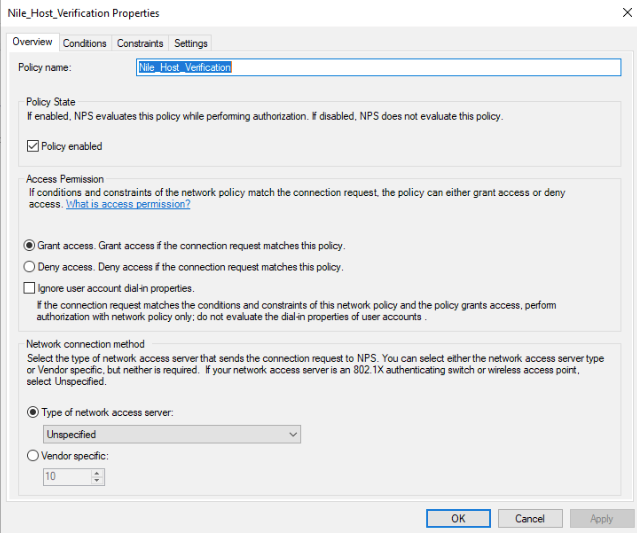
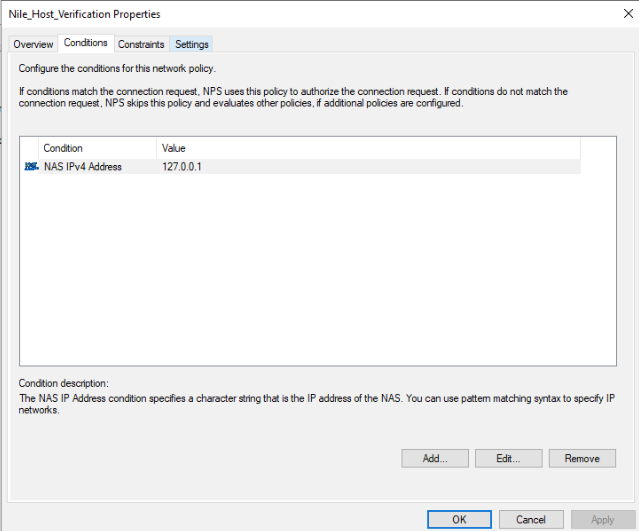
Example: to allow Nile account verification, we need to have an NPS policy that allows MS-CHAP for local NPS (127.0.0.1) - Create a new connection request policy name Nile_Host_Verifcation
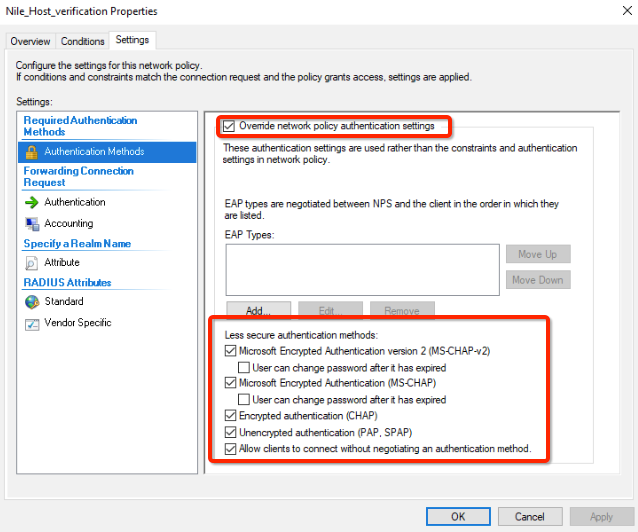
- Create a new Network policy name Nile_Host_Verifcation
- To verify RADIUS authentication, log onto Nile Portal: https://u1.nile-global.cloud/
- Navigate to Nile Portal ® Settings button ® Authentication tab
- Click on the blue RADIUS hostname (Example SE HQ NPS)

- From RADIUS configuration modification page, click on VERIFY HOSTS button
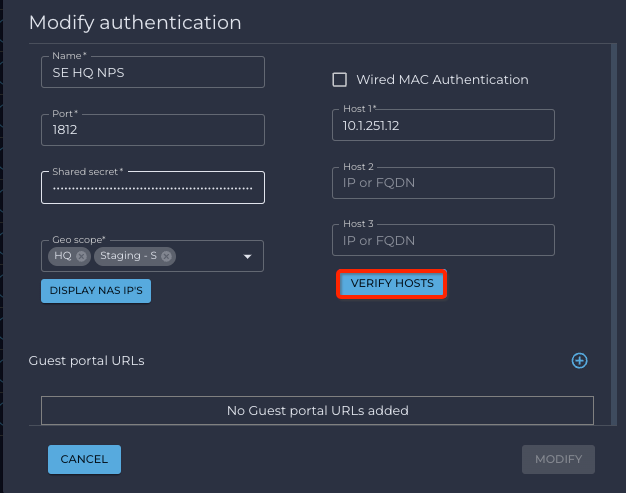
A new pop-up window opens.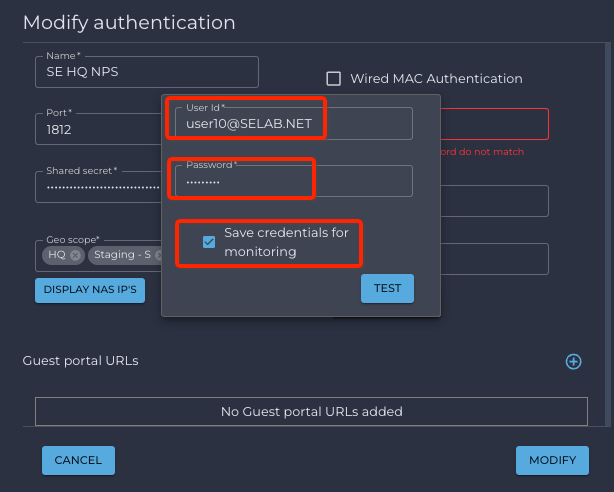
- User Id: MS Windows AD User account
- Password: User account password
- Save credentials for monitoring (Optional to use the account for Nile availability monitoring) if the testing account is not saved, Nile will use a dummy account for monitoring.
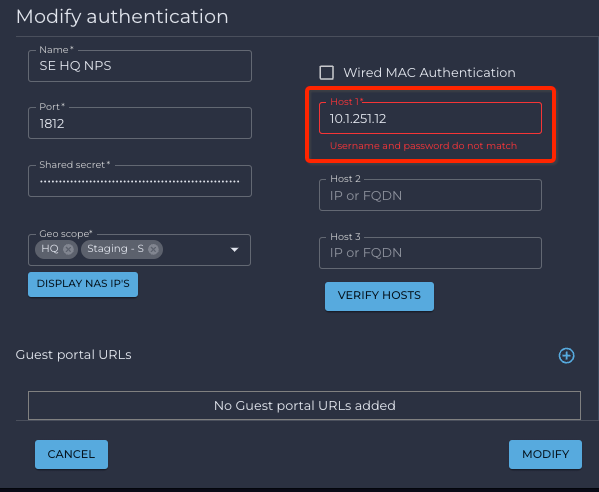
- Click on the TEST If the transaction fails, the IP address will be shown in red with the message “Username and password do not match”. The transaction failure will not impact monitoring or RADIUS functionality, this is only an indication that the RADIUS server failed to authenticate the user, to help with RADIUS authentication troubleshooting
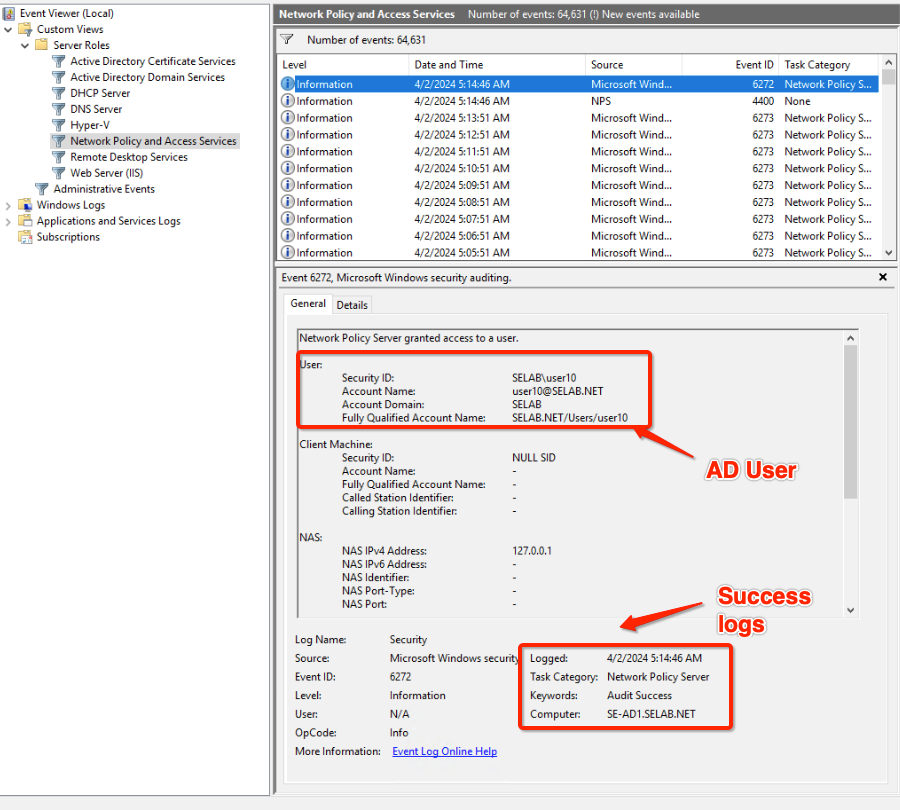
- If authentication is successful, a green circle with an arrow will display beside RADIUS host IP.
- You can verify Windows NPS logs for success or failure authentication.
Configuring Nile Segments and Wireless SSIDs (RADIUS)
- Log onto Nile Portal: https://u1.nile-global.cloud/
- Navigate to Nile Portal → Setting button → Segments tab
- Click on button; this opens a new Segment configuration panel
- In the General info sub-tab, enter a name in the “Name” field.
- Navigate to Nile Portal → Setting button → Segments tab → Service area sub-tab
- Click the SELECT SERVICE AREAS button
- Select (1) all sites, (2) one site, or (3) one zone, using the radio buttons and associated lists
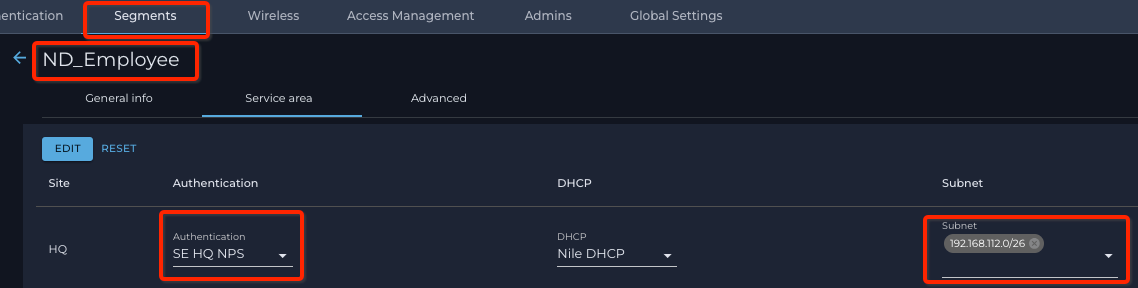
- Select the authentication server from the Authentication pull-down list.
- Select the DHCP server from the DHCP pull-down list.
- Select the subnet(s) from the Subnet pull-down list — you may select one or more
- Click the SAVE button.
- Navigate to Nile Portal → Setting button → Wireless tab
- Click on ? button; this creates a new SSID
- Click the Enterprise radio button
- Enter the Name for the SSID: this will be what the APs will use as a beacon
- Select the security type from the Security pull-down list
- Select the segment created earlier. (Example ND_Employee segment)
- Verify that you have entered the correct information
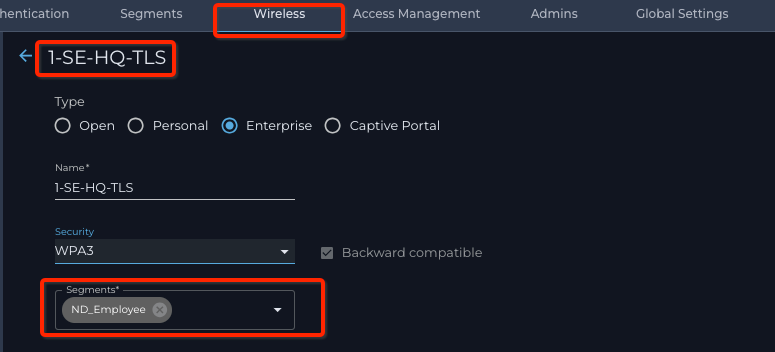
- Press the SAVE button
Microsoft NPS Wireless 802.1x Connection Test
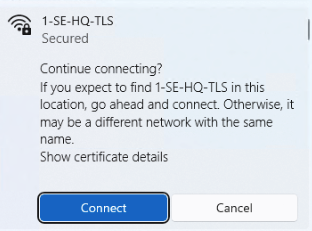
- From a Wireless-capable client device, select Nile 802.1x SSID; log in using a domain user member; and, verify that device connects to the SSID.Note: First-time clients need to accept the certificate and connect to the network using 802.1x; user needs to click on the Connect button to continue.
- Verify sign-in info and IP address. IP needs to be from segment subnet range; in our example 192.168.112.0/26 for ND_Employee

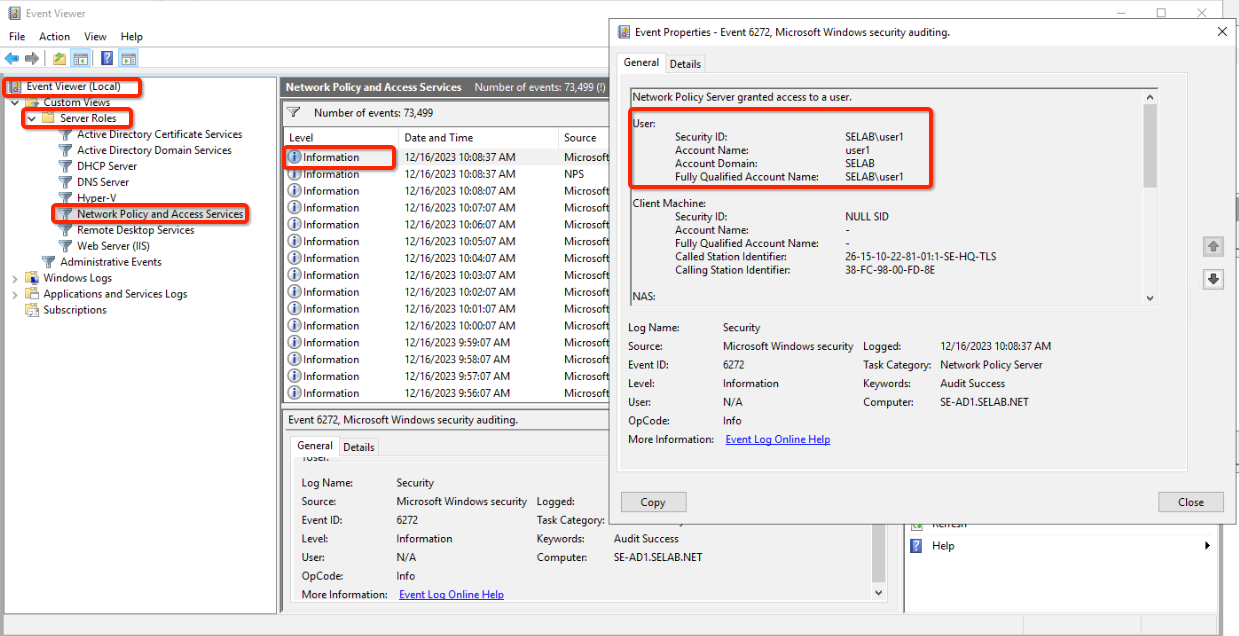
Verify NPS logs:
- Open Event Viewer, and then, under Custom views, select Server Roles ® Network Policy and Access Services
- If needed, filter for events that have Event ID 6273 or 6274. Most authentication failures produce these events.
Nile Segment mapping with Microsoft NPS Radius Server
- Log onto Nile Portal: https://u1.nile-global.cloud/
- Navigate to Nile Portal → Settings button → Wireless tab
- Click on the ? (edit) icon next to the name of the SSID, to edit the wireless SSID
- Add an additional segment from the drop-down list.
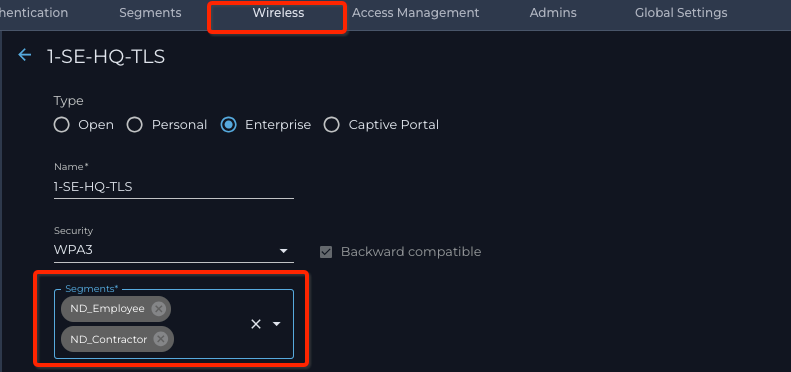
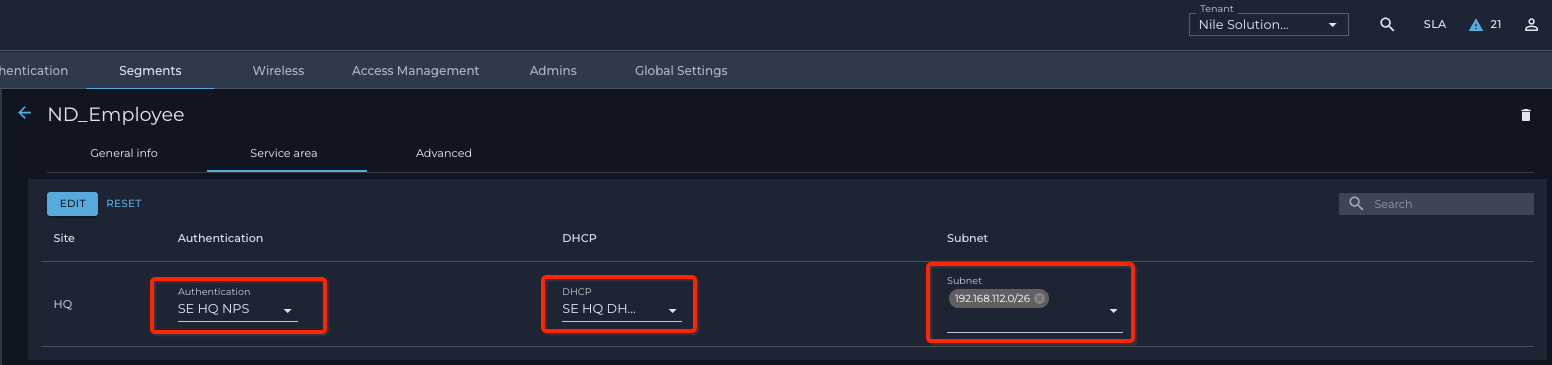
You may need to go back at look at the definitions of the segments in your list. In this example
(Nile Portal ® Settings button → Segments tab → edit ssid “ND_Employee” ® Service area subtab),
“segment ND_Employee” is configured with Microsoft NPS as an authentication server and IP address Subnet 192.168.112.0/26:
and
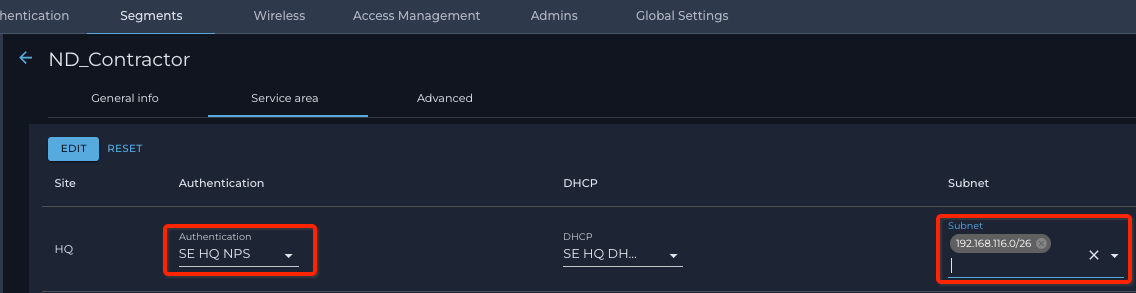
(Nile Portal ® Settings button ® Segments tab ® edit ssid “ND_Contractor” ® Service area subtab)
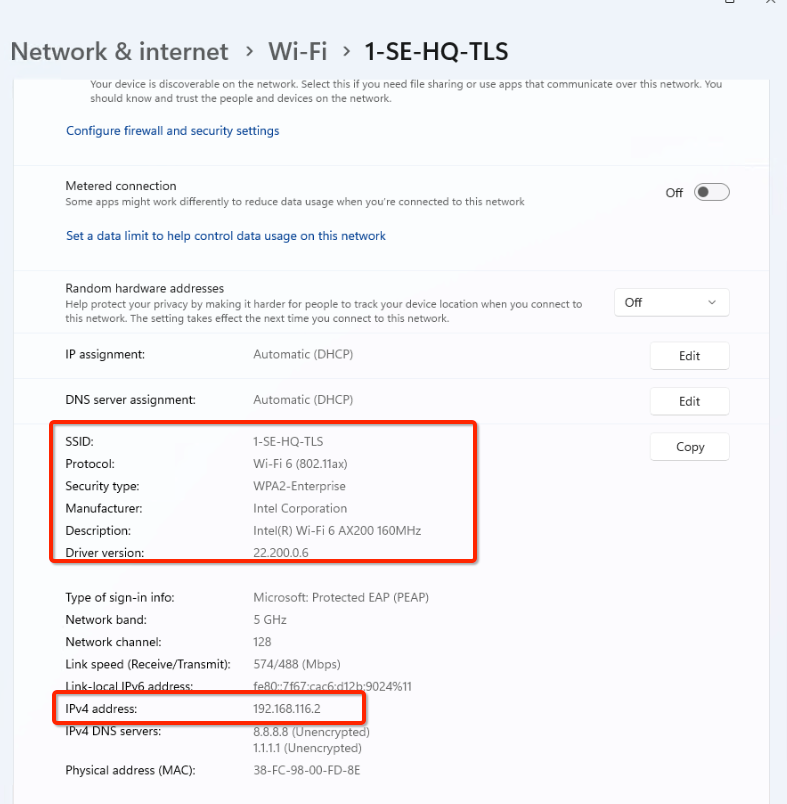
segment “ND_Contractor” is configured with Microsoft NPS as an authentication server and IP address Subnet 192.168.116.0/26:
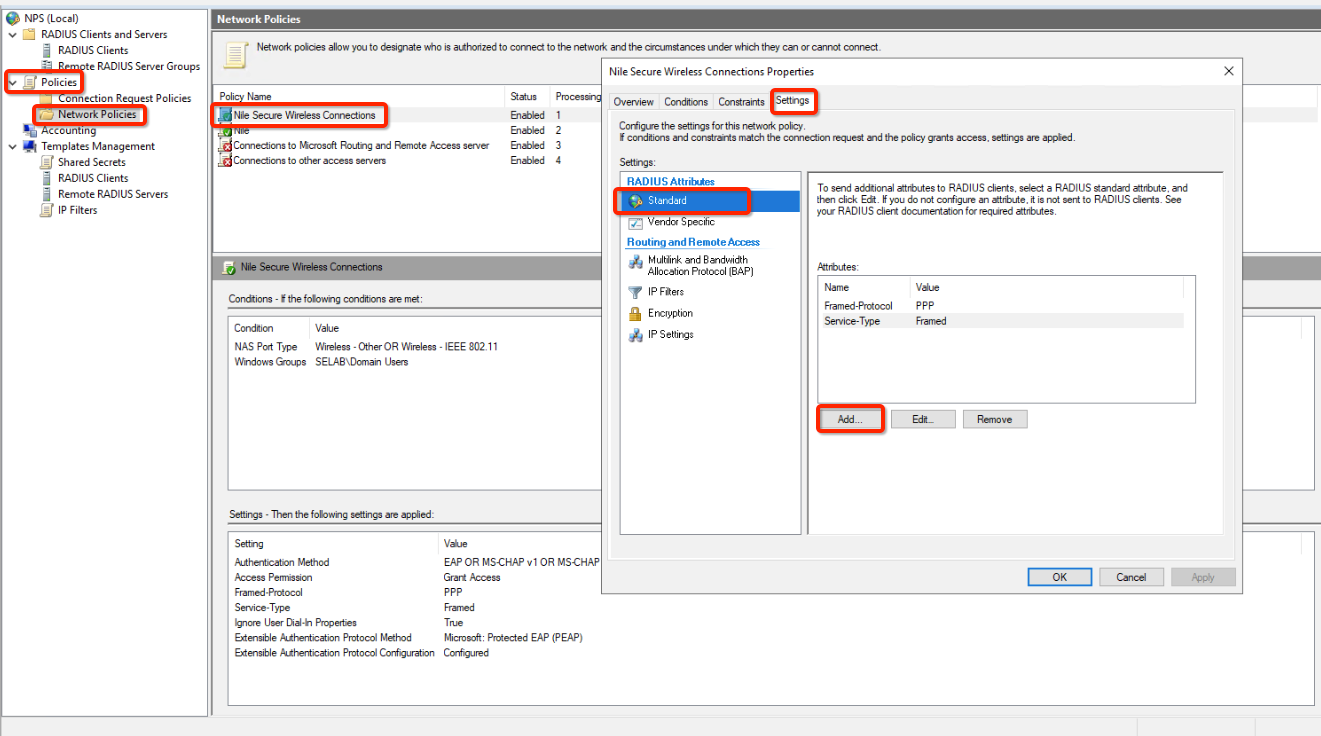
- In the Console, navigate to NPS (Local) ® Policies ® Select your Policy”
- Click on the Edit button.
- Select Setting ® Standard
- click on the Add button.
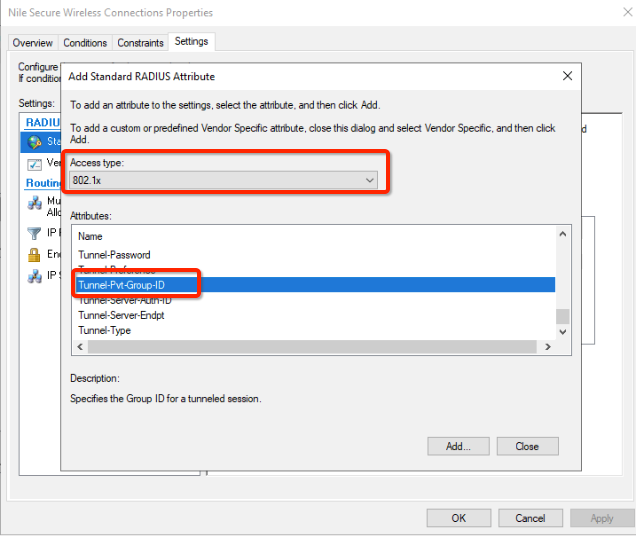
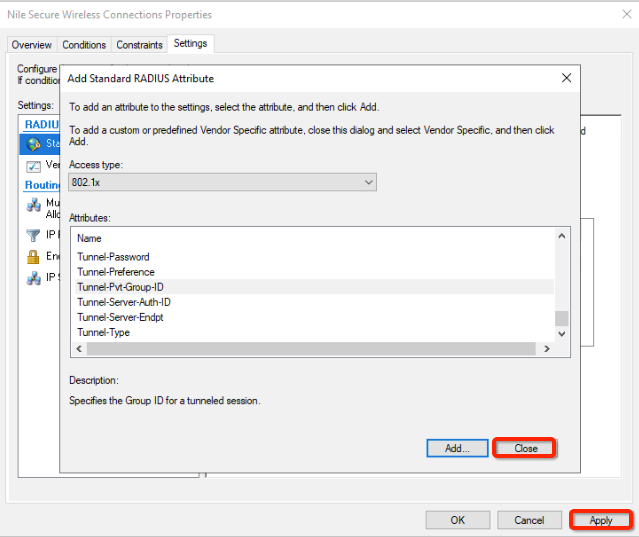
- From the Access Type drop-down list, select “802.1x”
- Click on attribute Tunnel-Pvt-Group-ID in the Attributes window
- This will use the tunnel group ID RADIUS standard attribute to assign Nile segment name to policy members.
- In Attribute Information, click the String radio button
- Enter the segment name into the value field for the attribute. The segment name is case sensitive.
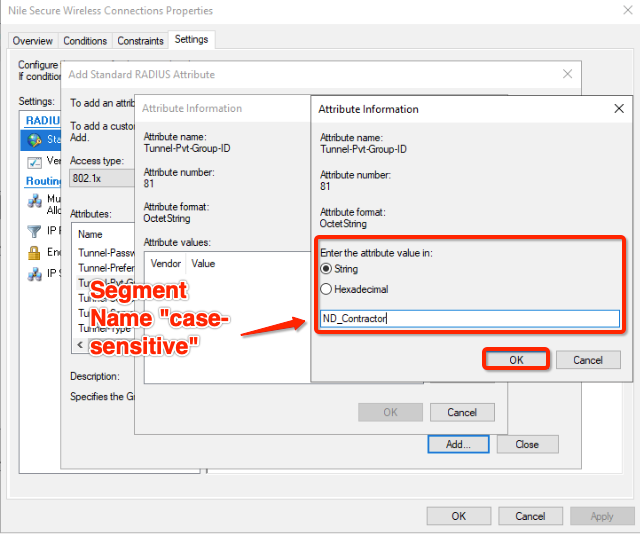
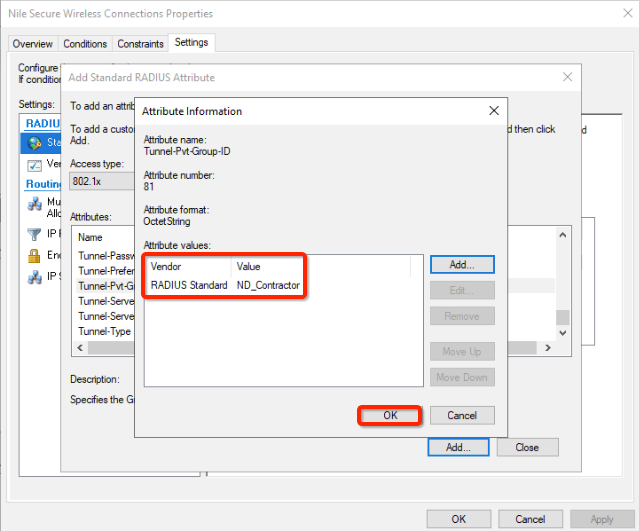
- Click on the OK button, to add Tunnel0Pvt-Group-ID attribute
- Click the Close button
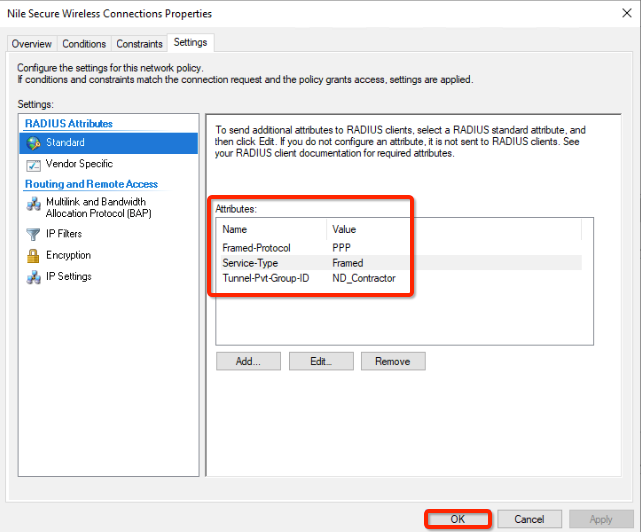
- Verify RADIUS standard attributes.
- Click the OK button
- Verify sign-in info and IP address. IP needs to be from segment subnet rang (in our example 192.168.116.0/26 for ND_Contractor)
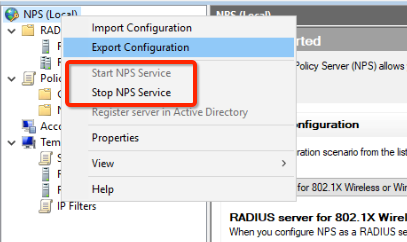
Note: NPS is a Microsoft Windows service. Adding or changing configs might require restarting the service. To restart, in the Console, navigate to NPS (Local), right-click on NPS (local), select Stops NPS Service to stop NPS and then select Start NPS Service.